

How to Get Printer Online Windows 7
Over the years, Windows has gotten much ameliorate almost how it handles networked printers. But if yous want to share a printer over the network, y’all may still need to practise a little legwork to get information technology all up and running. Here’s how it all works.
Setting up a printer on your network involves ii steps. The first step is getting the printer connected to the network, and there are 3 means you lot can do that:
- Connect the printer to the network direct. This is the easiest way to set up a network printer. It doesn’t require that another PC exist turned on to impress (like the below methods do), and yous don’t accept to get through the hassle of setting up sharing. And, since most printers made within the concluding few years have networking built in, there’s a skilful gamble your printer supports this option.
- Connect the printer to 1 of your PCs and share it with the network over Homegroup. If connecting a printer directly to the network isn’t an option, y’all tin can connect it to a PC on the network and share it with Windows Homegroup. Information technology’s like shooting fish in a barrel to set up, and is optimal for networks that are made up of mostly Windows computers. This method, even so, requires that the computer its continued to exist up and running in order for you to use the printer.
- Connect the printer to 1 of your PCs and share it without Homegroup. This is ideal if your network has other computers running different operating systems, if you desire more than control over file and printer sharing, or if Homegroup merely isn’t working very well. Similar the Homegroup method, this requires that the computer its connected to be up and running in order for yous to use the printer.
The 2nd step, once y’all’ve hooked up your printer, will be connecting other PCs to the network printer…which depends a lot on how you hooked information technology up. Confused nevertheless? Don’t worry. We’re almost to go over all of this.
Update: Microsoft
removed the HomeGroup feature from Windows x in the April 2018 update. Y’all tin can notwithstanding use HomeGroups if you lot’re using Windows seven or 8, but they won’t exist accessible by computers running Windows 10 (at least with the latest updates) unless you lot also set traditional file sharing.
Step One: Connect Your Printer to the Network
First, let’s talk about getting that printer connected to your network. As we mentioned above, you have 3 options hither. You tin can connect it straight to the network, you lot can connect information technology to a PC and share it through a Homegroup, or you can connect it to a PC and share it without using Homegroup.
Connect Your Printer Direct to the Network
Nearly printers these days have networking congenital in. Some come equipped with Wi-Fi, some with Ethernet, and many accept both options available. Unfortunately, we can’t give you precise instructions for getting this done, since how you practise it depends on the type of printer yous have. If your printer has an LCD display, chances are you tin can find the network settings somewhere in the Settings or Tools portion of the menus. If your printer has no brandish, yous’ll probably accept to rely on some serial of physical button presses to tell it whether information technology should utilise its Wi-Fi or Ethernet network adapter. Some printers fifty-fifty have a dedicated easy connect button that tin ready up the Wi-Fi for you.
If yous’re having trouble setting up a printer that connects directly to the network, the manufacturer should have instructions for making information technology happen. Cheque the manual that came with your printer or the manufacturer’southward web site for data on hooking it upward.
Share a Printer Connected to a PC past Using a Homegroup
Sharing a printer with Homegroup is super easy. Starting time, of course, y’all’ll desire to make sure that the printer is connected to one of the PCs on the network and fix properly. If that PC tin print to the printer, so you’re good to become.
First past firing upwardly the Homegroup control console app. Click Beginning, type “homegroup,” and then click the choice or hit Enter.

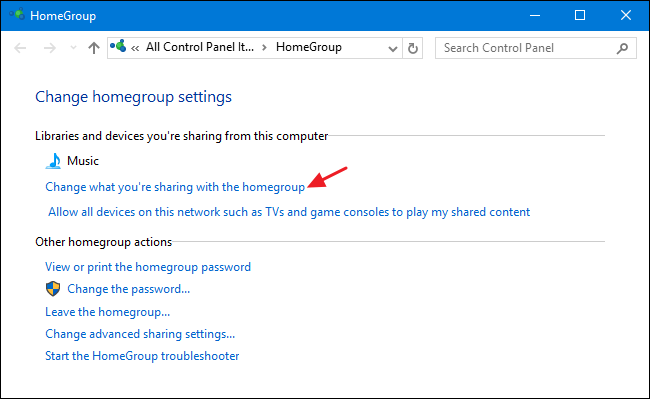
What you do next depends on what yous come across in the Homegroup window. If the PC you have the printer continued to is already part of a Homegroup, you’ll see something like the post-obit screen. If it shows that you’re already sharing printers, and so y’all’re done. You tin can skip on to step two, where you connect other PCs on the network. If you lot’re not already sharing printers, click the “Change what you’re sharing with the homegroup” link.
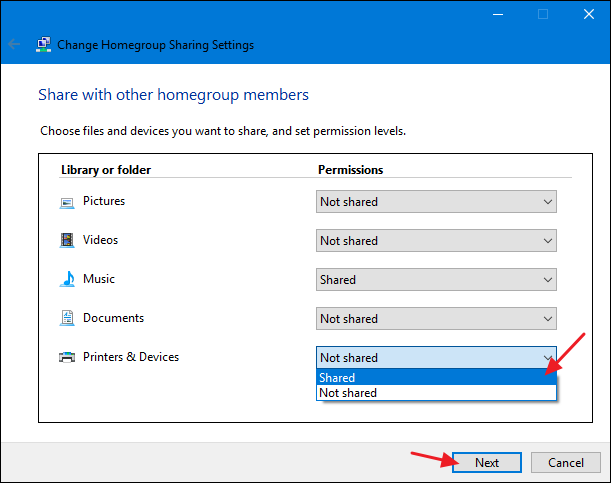
On the “Printers & Devices” driblet-down menu, cull the “Shared” choice. Click Next and then you lot can shut the Homegroup options and movement on to step two.
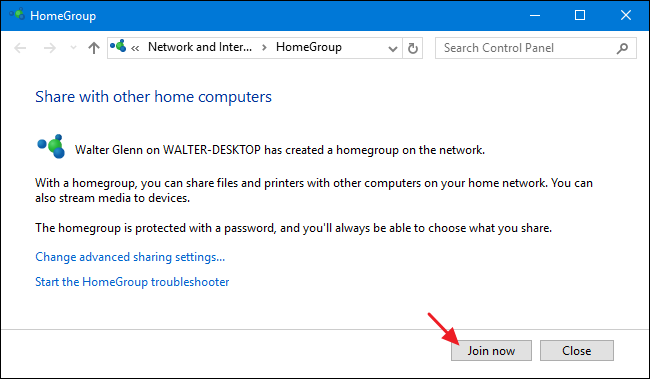
If there is already a Homegroup created for other PCs on the network, simply the PC yous’ve got your printer continued to isn’t a member, the main screen when you lot outset the Homegroup control panel app will look something like the 1 below. Click the “Join now” button and then click “Next” on the following screen that just tells you a flake about Homegroups.
Gear up your sharing options, making sure that “Printers and devices” is set to “Shared,” and then click “Side by side.”
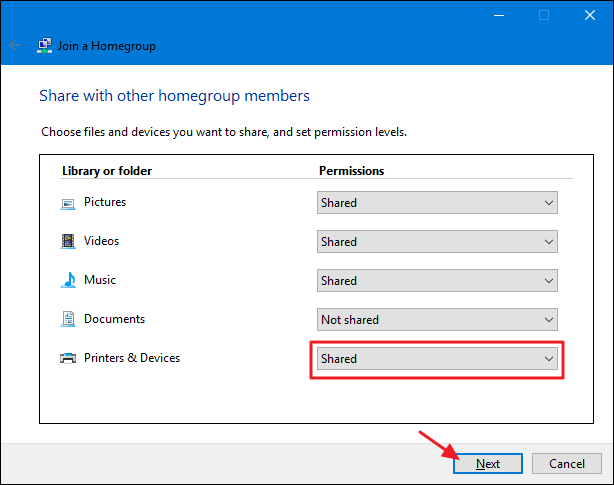
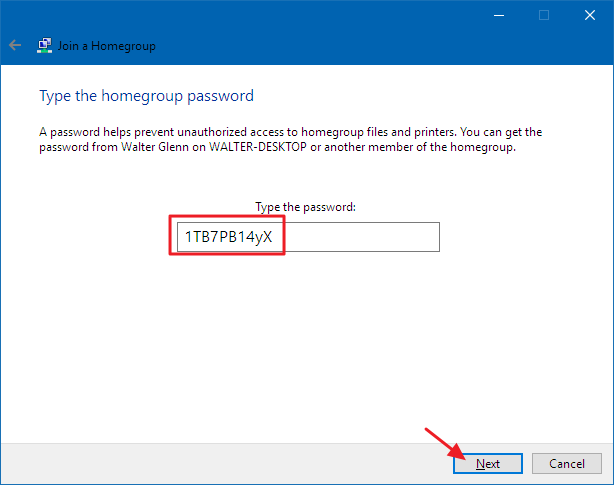
Type the password for the Homegroup then click “Adjacent.” If you don’t know the countersign, go to one of the other PCs on the network that is already a member of the Homegroup, launch the Homegroup control panel app, and y’all can look information technology upwardly there.
If y’all’re connecting from another PC that you’ve signed onto using the same Microsoft account every bit the PC that’s already a member of the Homegroup, Windows 8 and 10 won’t ask for your password. Instead, Windows will authorize y’all automatically.
On the concluding screen, click the “Finish” push and so you tin movement on to stride two and get your other PCs on the network connected to the printer.

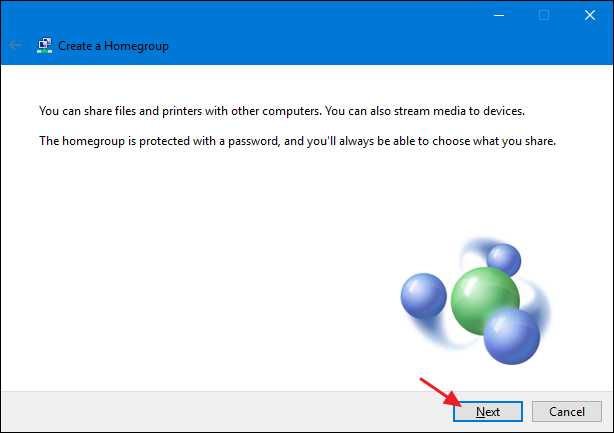
And finally, if in that location is no Homegroup at all on your network, you lot’ll run into something similar the following screen when you open the Homegroup control console window. To create a new homegroup, click the “Create a homegroup” button.

The post-obit screen but tells you a little well-nigh Homegroups. Get alee and click “Side by side.”
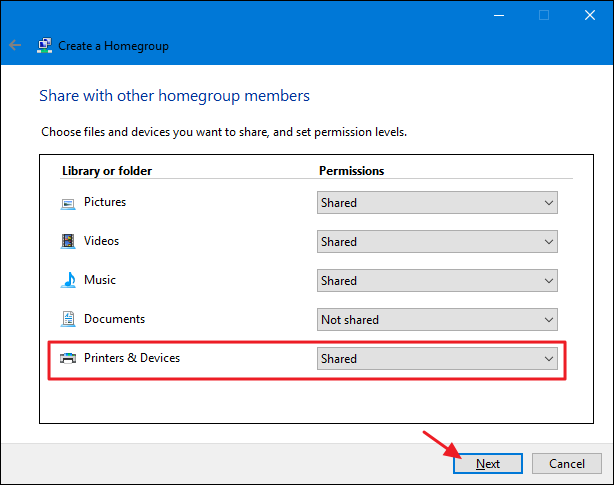
Cull whatever libraries and folders yous desire to share with the network from the PC you’re on. Only make sure that y’all select the “Shared” selection for “Printers & Devices.” Click “Next” when y’all’re done making your selections.
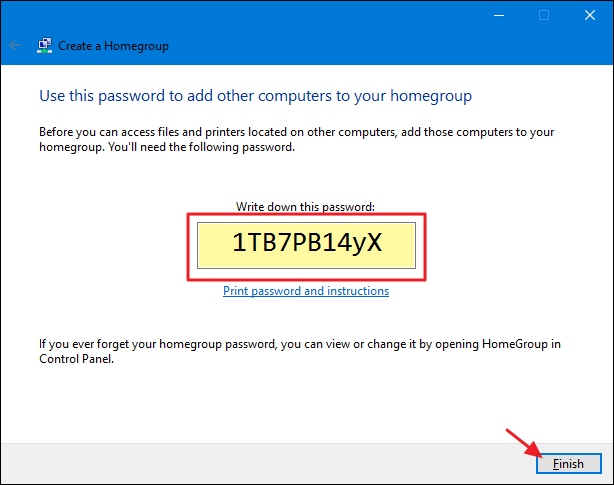
The concluding screen shows the password you lot’ll need for other PCs on your network to connect to the Homegroup. Write it down and so click the “Finish” button.
Now that you’ve got your Homegroup prepare and your PC is sharing its printers with it, you can skip down to footstep two and get those other PCs on the network connected to the printer.
Share a Printer Connected to a PC Without Using a Homegroup
If yous have computers or mobile devices on your network that run an OS other than Windows vii, viii, or 10–or you but don’t want to use Homegroup for some reason–you tin always employ the sharing tools that have ever been a part of Windows to share a printer with the network. Over again, your first step is making sure the printer is connected to a PC and that you can print to information technology.
Click Start, blazon “devices and printers,” and so hit Enter or click the issue.

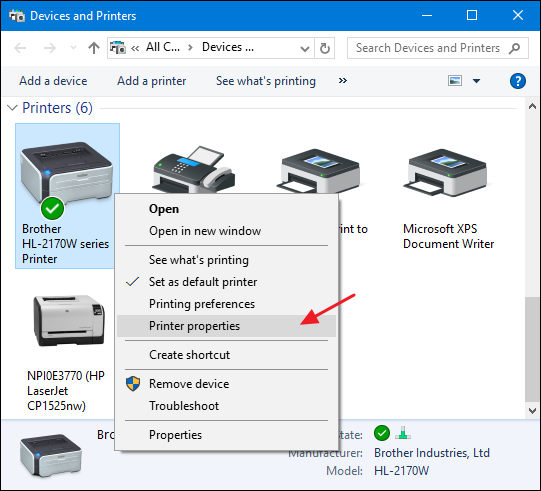
Right-click the printer you want to share with the network so select “Printer properties”.
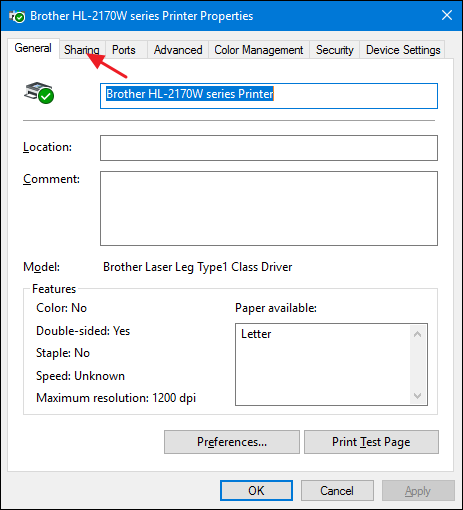
The “Printer Properties” window shows you all kinds of things you can configure well-nigh the printer. For now, click the “Sharing” tab.
RELATED:
Customizing Your Network Sharing Settings
You are informed that the printer will not be available when your figurer sleeps or it is close down. Also, if you are using password protected sharing, you are informed that only users on your network with a username and password for this figurer can print to it. Credentials are a one-time thing yous’ll have to enter the offset time you connect some other PC to the shared printer; you won’t have to exercise it each time you lot print. If yous’d prefer, you lot tin make sharing available to guests so that passwords aren’t necessary, but that setting volition also utilise to any files you have shared. We advise you read up on
customizing your network sharing settings
before making that decision.
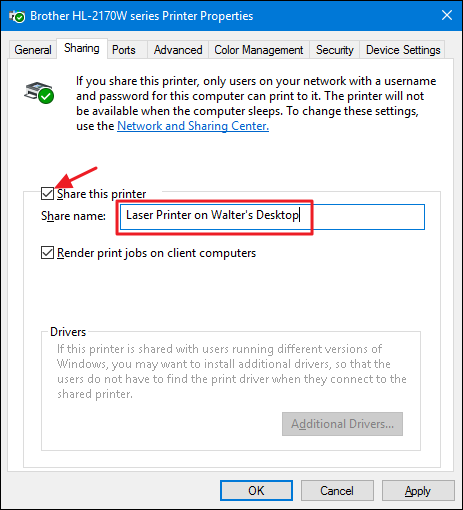
To go along, enable the “Share this printer” selection and, if yous want, give the printer a friendlier proper name and so that others on the network tin more than easily identify the printer.
The other pick you lot can fix here is whether yous would like to return print jobs on client computers. If this setting is enabled, all the documents that will be printed are rendered on the computers where people are doing the press. When this setting is disabled, the documents are rendered on the computer to which the printer is attached. If it’s a PC that someone uses actively, we recommend enabling this setting so that system functioning is not impacted every time something gets printed.
When you’re washed setting things up, become alee and click “OK.”
Now that y’all’ve shared the printer, other PCs on your network should be able to connect to it. And so, you’re ready to motion on to stride 2.
Step Two: Connect to Your Printer from Any PC on the Network
At present that you’ve got your printer connected to the network using i of the above methods, it’s time to turn your attending to the second part of the process: connecting other PCs on the network to that printer. How you practice that really but depends on whether you’re using Homegroup or not.
Connect to a Printer That’s Shared past a PC Using a Homegroup
This is probably the easiest pace in this whole tutorial. If you’ve got the printer connected to a PC and that PC is sharing the printer equally part of a Homegroup, all y’all have to do is make sure that other PCs on the network are also joined to the Homegroup. You can employ the same process we went over in Footstep One to go them joined. When PCs are part of the same Homegroup, Windows will automatically connect to any printers shared from other PCs. They’ll just show up in your Devices and Printers window automatically and any PC in the Homegroup can print to them. Super unproblematic.
Connect to a Printer Without Using Homegroup
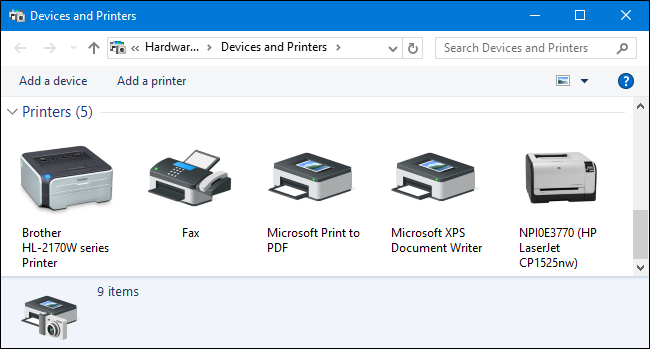
If your printer is connected directly to a network, or is shared from a PC without using Homegroup, you’ll have to do a little more piece of work to connect to it from other PCs on the network. It’s even so pretty straightforward, though. Click Start, type “devices and printers,” and then hit Enter or click the event.
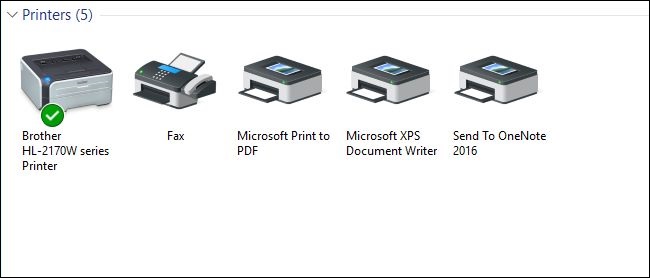
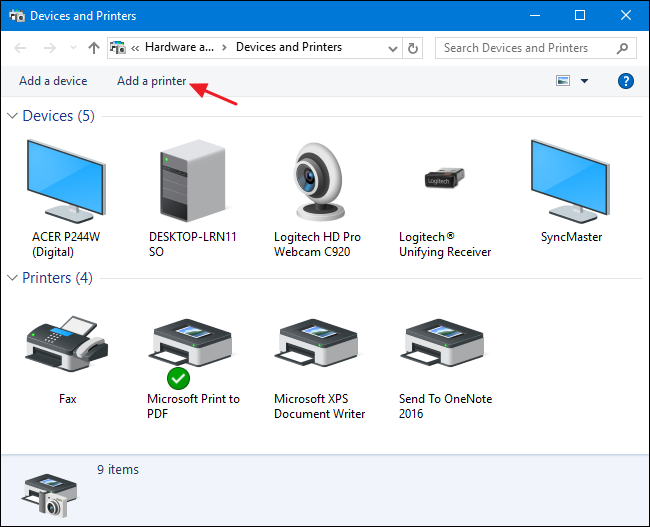
The Devices and Printers window shows a drove of devices on your PC. Click the “Add a printer” link to get started adding your network printer.
Windows will perform a quick scan of your network for discoverable devices that are not even so installed on your PC and brandish them in the “Add a device” window. Chances are high that you’ll encounter your printer on the list, whether it’s directly connected to the network or shared from some other PC. If you come across the printer y’all’re looking for, and then your job just got super easy. Click the printer you want to install. Windows will handle the installation, download drivers if needed, and ask you lot to provide a name for the printer. That’s all yous have to exercise.
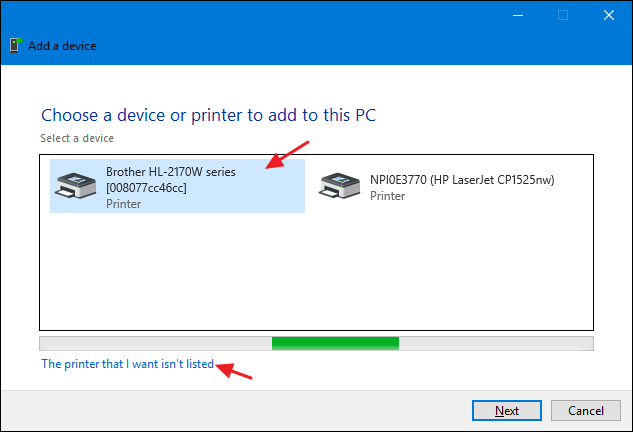
If you lot don’t encounter the printer you want to install–and y’all’re sure you’ve got information technology properly connected to the network–click the “The printer that I want isn’t listed” link. The next window will nowadays you lot with several options for helping you notice it:
- My printer is a little older. If you select this option, Windows will perform a more than thorough browse of your network looking for the printer. In our feel, though, information technology rarely finds anything that it didn’t already observe during its initial scan. It’s an easy plenty option to endeavour, but it may take a few minutes.
- Select a shared printer by name. If the network computer is shared from some other PC, this is the best option for finding it. If you lot know the exact network name of the computer and printer, you lot can blazon it here. Or you can click the “Browse” button to look through the PCs on your network that have sharing enabled and see if yous can find the printer that mode.
-
Add a printer using a TCP/IP address or hostname. If your printer is attached directly to the network and you know its IP accost, this is probably the simplest and surest pick. Most network printers take a function that lets you lot determine their IP accost. If your printer has an LCD display, you may be able to find the IP address past scrolling through the printer settings. For printers without a display, you can usually perform some sequence of push button presses that will print the settings for you. If all else fails, yous can always employ an IP scanning app similar
Wireless Network Watcher
to locate devices on your network. Check out
the last section of this guide
for more data on how to do that. - Add a Bluetooth, wireless, or network discoverable printer. If y’all choose this selection, Windows will scan for those types of devices. Again, nosotros’ve rarely seen it pick upward a device that it didn’t find during the initial scan. Simply, information technology still may be worth a try.
- Add together a local printer or network printer with manual settings. This option may assistance you get a printer added if zip else works. Information technology’s by and large for configuring a local printer by specifying verbal port information, just there is 1 setting in particular that tin help with network printers if you know the model. When asked to specify a port, you lot can choose a Windows Cocky Discovery option, which is listed toward the lesser of the available ports as “WSD” followed by a string of numbers and messages. When you choose that, Windows will ask you lot to specify a model so that it tin can install drivers. When you’re done, Windows volition and then monitor the network for that printer. Information technology’s a longshot, but it’south worth a try if all else fails.
You’ll find all these options are pretty straightforward and feature brusk wizards for walking you through the process. Since TCP/IP is the surest way to become a printer added, we’re going to continue with that as our example. Select “Add a printer using a TCP/IP accost or hostname” and then click “Side by side.”

Type the IP accost for the printer into the “Hostname or IP accost” box. Make sure the “Query the printer and automatically select the commuter to use” bank check box is selected and so click “Next.”

Type a new name for printer if the default name doesn’t accommodate yous and so click “Adjacent.”

Choose whether to set the new printer every bit the default, print a test page if you want to make sure everything’due south working, and so click “Cease” when you lot’re done.

Hopefully, you never need to bother with virtually of this stuff. If your network printer is properly connected to the network, the chances are loftier that Windows will pick it up and install information technology for you lot correct off the bat. And if your network is by and large Windows machines and you use Homegroup for sharing files and printers, things should too happen mostly automatically. If it doesn’t–or if you have a more complicated setup–at least you know you have some options.
