

Upgrading Firmware Mac Pro 4,1 to 5,1
Updating the firmware on a Mac Pro isn’t difficult, simply it is possible to “miss” firmware upgrades. This guide is for anyone looking to get to the latest (and most likely last) firmware released for the Mac Pro v,1s, without having to install Mojave 10.fourteen.x, or if yous already have installed Mojave, or are looking to install Mojave. My first endeavor, my firmware was stuck at 138.0.0.0.0.x even when running Mojave ten.14.six. Updating the firmware adds key funcitonality to the Mac Pro five,1s, most notably native NVMe m.2 boot support. To larn more about Firmware and the Mac Pro 5,1s, run into the
Firmware Upgrades department of my Mac Pro Upgrade Guide.
These aren’t the only instructions on the spider web, as
MP5,one: What you have to practice to upgrade to Mojave (BootROM upgrade instructions thread)
for firmware upgrading. However, this the method I’ve found well-nigh reliable for users who are having firmware troubles.
Step 0: Remove unsupported GPUs
The biggest alter for macOS Mojave is the deprecation of OpenGL and OpenCL. OpenGL has been a thorn in Apple’south side for quite some time, equally it’due south been nearly expressionless for years. Vulkan, the OpenGL successor, wasn’t quite gear up for primetime when Apple originally created Metal for iOS and thus decided to port it macOS. Despite the annoyingness of having to meet the requirements, it was a necessary evil. Mojave will not install if you have a not-metal supported GPU.
Note:
some users are reporting they had to remove all PCIe cards sans their storage controller (SATA card) and GPU to install the firmware update. I did not. If you encounter problems, try removing additional PCIe cards.
Step 1: Accept a 10.13 drive
Unfortunately, this is the biggest pain if you’ve already updated. You’ll need a separate volume to boot into ten.thirteen. Amazon and Newegg each accept 120 GB SSDs for under $xx USD if you demand a temporary drive to install macOS 10.13 on. (upside is you can purchase a USB case and turn into a very fast USB 3.0 drive afterward or return it). Y’all tin can get old versions of macOS via the Mac using
DosDude1’s installer
if y’all can’t admission it. If you lot accept no intention to upgrade to Mojave or already accept it installed., don’t worry. We won’t be installing Mojave.
Pace 2: Kick x.xiii
The adjacent pace is pretty straight forward, kick into your install of macOS 10.xiii if you haven’t already.
Pace iii: Download x.14.6 Combined installer
Fortunately, firmware flashing does non require updating in a item society. I went from 138.0.0.0.0 to 144.0.0.0.0 without any problems. There’s several avenues for this, including the Mac App store, merely when I used the Mac App Store road, I didn’t get the combined Os installer (The Mojave installer + all the updates to Mojave). The easiest way to obtain the final combined update for Mojave is to use Dosdude1’due south installer. Much like before,
download the Bone DosDude1’due south installer, even though we have supported hardware but with the patcher for 10.xiv.
Clarification: You do non demand to use the DosDude1 installer, as you can take hold of the update via the App store or other sources only I constitute this easier. Manifestly this link was posted this on MacRumors and a few posters didn’t read the full instructions and suggested that
I was advocating using DOSdude1
on the OS. I am not. The Mac Pro 4,1/5.1 does not need DOSDude1, so exercise not run the patcher on Mojave. The Patcher just happens to be extremely reliable about fetching the right version, and skips the hassle of the App Store.
- Go to
DOSdude1 Mojave patcher
and download it -
Launch the patcher.
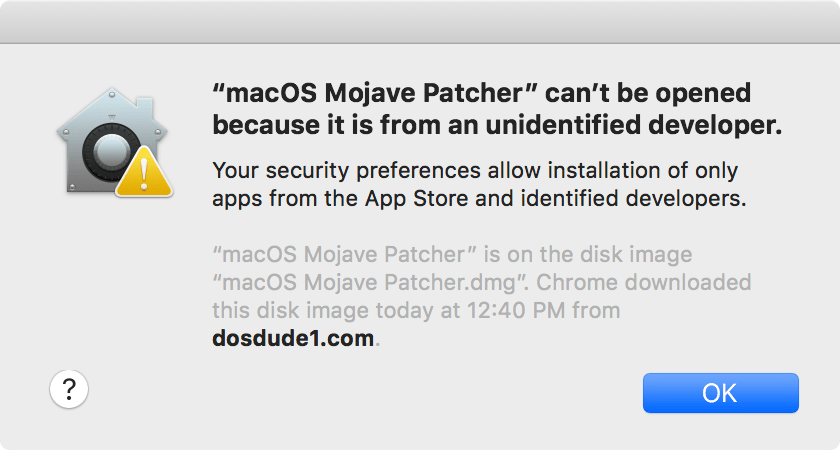
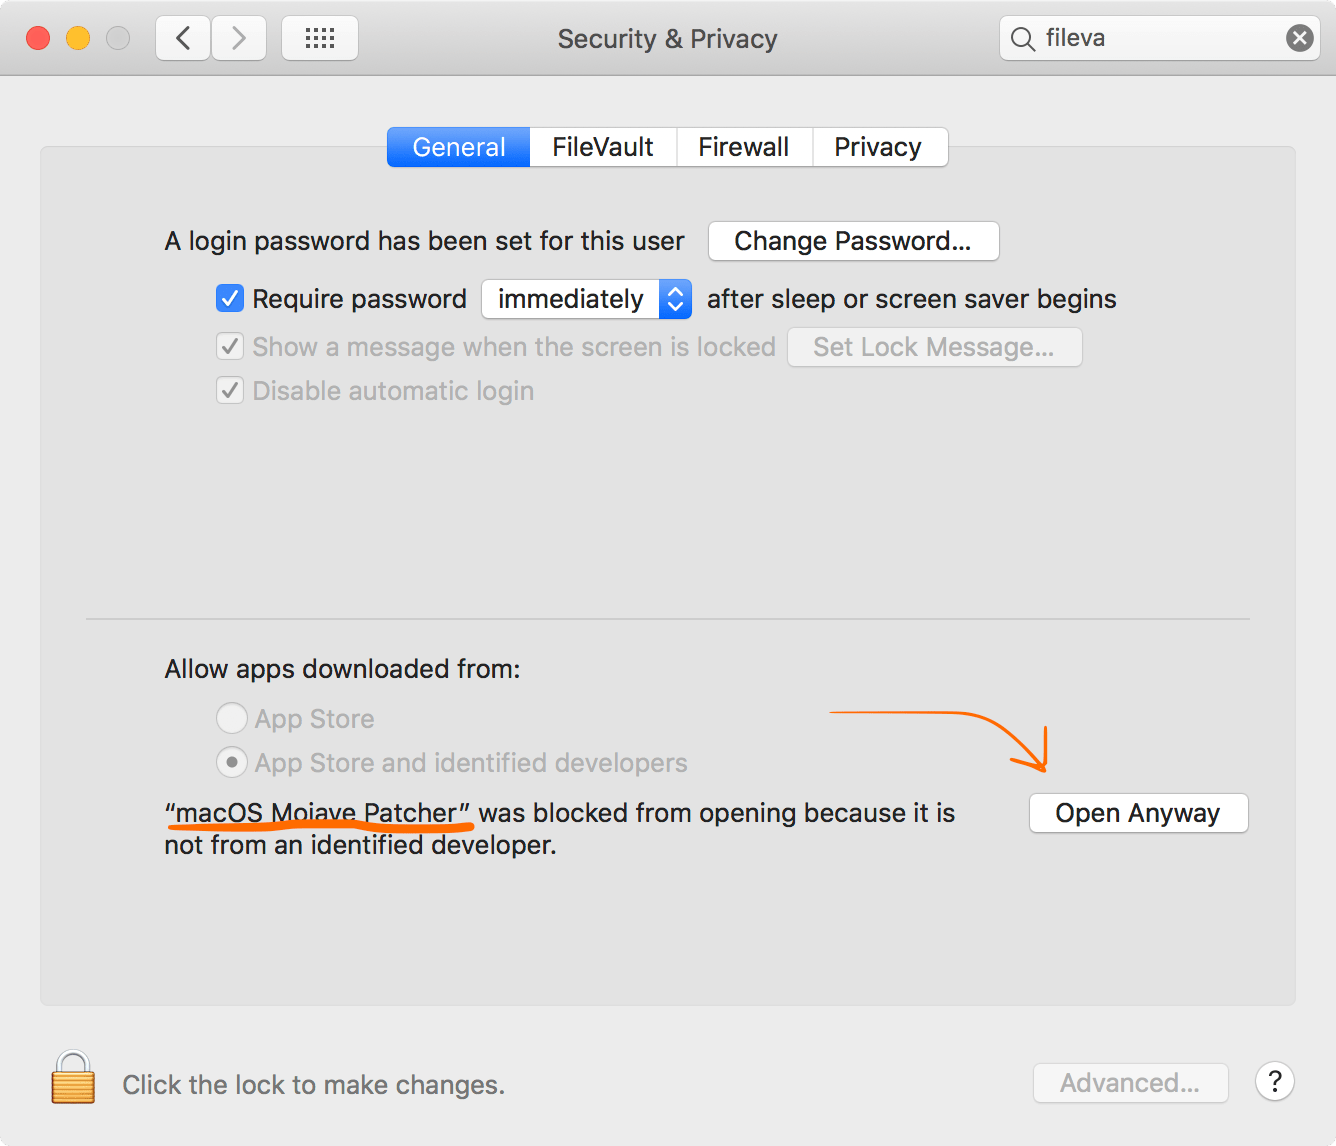
Depending on your security settings, your mac may suggest information technology’s from an unverified developer. Go to the organisation prefs, Security and Privacy (full general), and allow the app to open.
You lot’ll be bugged one last time.
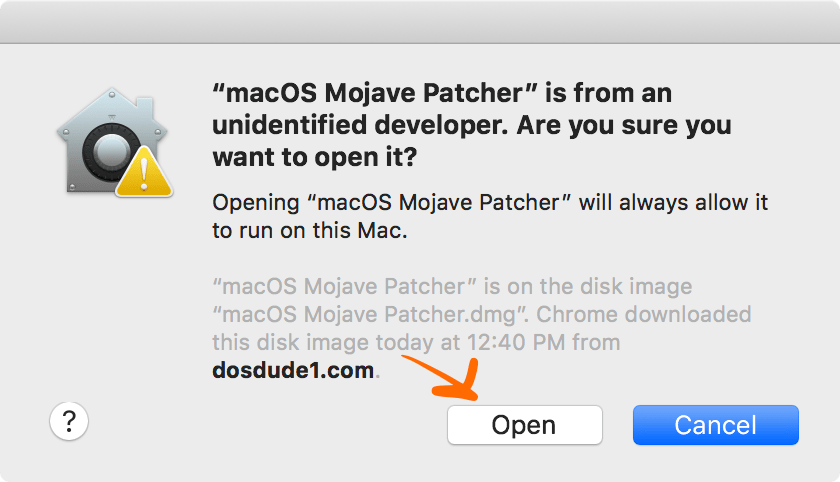
-
The patcher should warn you lot that you are on supported hardware.
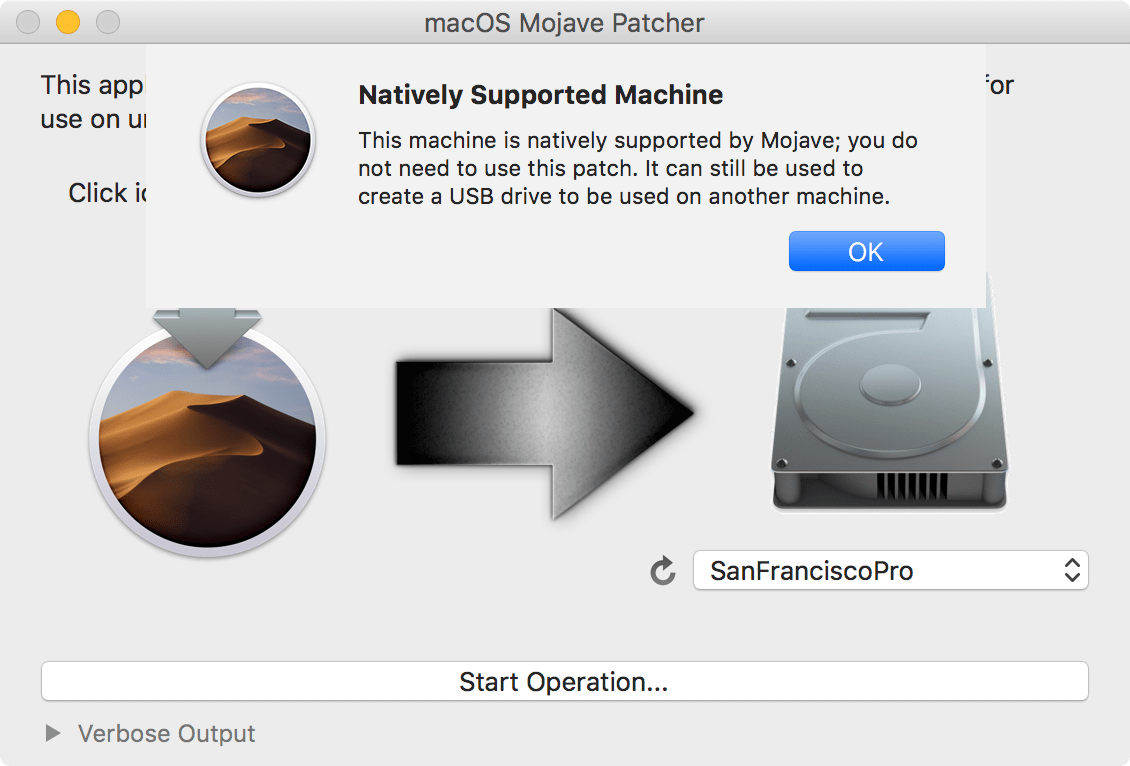
This is fine, ignore the message. Within the patcher, select the download Mojave from the Tools menu.

Step 5: Boot the Mac
Using the instructions in the previous image, press and hold the push until information technology blinks. If you lot practise non have an EFI enabled GPU (meet more about
EFI in my Mac Pro Upgrade guide), you volition not see any video output.I trimmed down the video, as information technology took about 15 seconds of holding earlier the button flashed. Afterward the push flashed, the internal speaker emmitted a long lowfi “boop” sound.
Footstep 5: Verify
Get to About this Mac, and click arrangement report. Under the first screen, look for the “Kick Rom” text. This should list your firmware version. From here, you tin can proceed using 10.thirteen.six, upgrade, or boot to your 10.fourteen volume.
The 144.0.0.0.0 firmware works with any version of macOS your Mac Pro supports.
Updated: November 13th, 2019 MacRumors feedback
Updated: Nov 4th, 2019 based on Feedback from
Mac Pro Users
user grouping on Facebook.
