

Line 6 Spider Jam Firmware Update How to
![]()
®
Spider Jam
Advanced Guide
An in-depth guide to the features and functionality of the Spider Jam.
Electrophonic Limited Edition
Please Notation:
Line six and Spider Jam are trademarks of Line 6,Inc. All other product names, trademarks and artists’ names are the property of their respective owners, which are in no way associated or affiliated with Line half-dozen. Product names, images, and artists’ names are used solely to identify the products whose tones and sounds were studied during Line 6’s sound model development for this production. The use of these products, trademarks, images, and artists’ names does not imply whatsoever cooperation or endorsement.
Spider Jam Advanced Guide © 2008 Line six, Inc.
Tabular array of Contents
|
Updated Features…………………………………………………………. |
1•1 |
|
SD Browser……………………………………………………………………………………….. |
one•i |
|
Playback Levels, Input Levels………………………………………………………………. |
1•two |
|
Menu Items……………………………………………………………………………………….. |
1•3 |
|
Jam Control Fashion……………………………………………………………………………… |
i•4 |
|
SD Card Details……………………………………………………………. |
2•one |
|
Format Card………………………………………………………………………………………. |
2•ane |
|
Transfer Recording To Card………………………………………………………………… |
two•2 |
|
Transfer Recording From Card.……………………………………………………………. |
2•ii |
|
Save Rec Mix Equally WAV To Carte du jour………………………………………………………….. |
two•iii |
|
Import WAV File From Bill of fare……………………………………………………………….. |
2•three |
|
Transfer All To Card…………………………………………………………………………… |
two•4 |
|
Transfer All From Carte……………………………………………………………………….. |
2•4 |
|
Firmware Version, Firmware Upgrade…………………………………………………… |
2•five |
|
Time Stretch &Varispeed…………………………………………….. |
3•i |
|
Fourth dimension Stretch/Pitch Shift |
iii•1 |
|
Pitch/Tempo Preview………………………………………………………………………….. |
iii•two |
|
Varispeed…………………………………………………………………………………………… |
iii•2 |
|
Recording Restrictions……………………………………………………………………….. |
3•3 |
|
Workflow……………………………………………………………………… |
4•1 |
|
Recording, Saving………………………………………………………………………………. |
4•1 |
|
Jam Files, WAV Files…………………………………………………………………………… |
4•2 |
|
Loops………………………………………………………………………………………………… |
4•iii |
|
Appendix : FAQ……………………………………………………………. |
A•1 |
|
Questions & Answers………………………………………………………………………… |
A•1 |
Updated Features
Updated
Features
Welcome to the Spider Jam Advanced Guide. This guide contains in-depth details of Spider Jam’s features and functionality which were not covered in the Pilot’s Handbook. With the release of v2.07 firmware (required for SD card features), you can now:
•
Play, record, salve, exercise mixdowns and import WAV files from SD menu (up to 2 GB).
•
Alter tempo and pitch independently using Time Stretch/Pitch Shift.
•
Select and load recordings via FBV with extended Jam Command features.
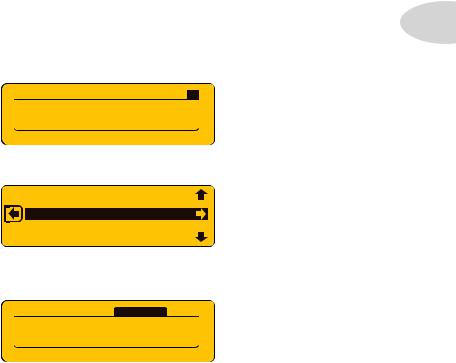
SD Browser
|
When an SD menu is inserted in the Spider Jam’s SD menu slot, press the |
i•i |
||||||||||
|
and you’ll run across 4 main tabs displayed in the LCD. In addition to the |
|||||||||||
|
Recordings |
|||||||||||
|
SD |
|||||||||||
|
SONGS |
DRUMS |
RECORDINGS |
|||||||||
|
Plough Wheel To |
|||||||||||
|
Scan SD |
|||||||||||
•
To scan the files you accept saved on your SD card, select
SD
and turn the bicycle.
HARMGTRS
DRUMMIX1
REC#3NEW
GTRLOOP2
BASSFIG1
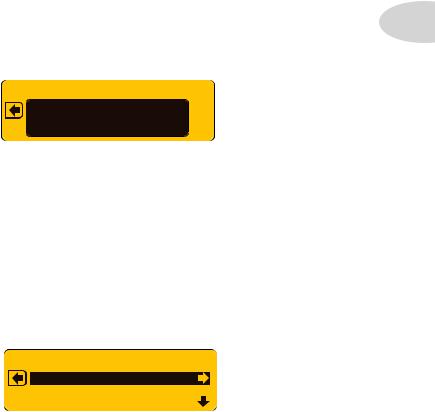
•
You lot’ll come across a listing of all your SD card’south recordings and WAV files. To load any file into Spider Jam’due south playback buffer, select it past turning the cycle and pressing the R Pointer
push.
SONGS DRUMS
 RECORDINGS
SD
REC#3NEW
|
LOOP: 00:xi:23 |
FREE: 32:fifteen:44 |
•
Once you offset using an SD bill of fare, we recommend you e’er save to SD card instead of internal retention. If you have previously saved recordings in internal retentivity, we recommend you transfer them to SD card also, then delete them from internal retentivity. This keeps internal memory free for maximum recording time, and makes it easy to back up all your files: pop the SD card into your PC and make copies at that place.
Updated Features
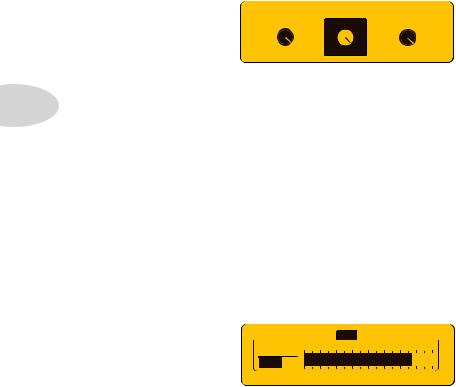
Playback Levels
Press the
LEVEL
button to access
Playback Levels. On this screen y’all accept contained level control of the
Song/Drums
track, the
Guitar
track and the
Mic/Aux/Wav
track.
These are also the controls you’ll use for Mixdowns (see folio 2•three for Mixdown info).
|
PLAYBACK LEVELS |
|||||||||||
|
100% |
|||||||||||
|
100% |
100% |
||||||||||
|
GUITAR |
|||||||||||
|
SONG/DRUMS |
MIC/AUX/WAV |
||||||||||
|
1•two |
• |
||||||||||
|
or L Arrow buttons. |
|||||||||||
•
One time you select the playback runway you want to arrange, plow the wheel to set the playback level of that track, from 0 (off) to 100%.
This makes it easy to balance the 3 tracks of your currently loaded recording, and also provides a way to mute the private tracks if desired.
Input Levels
With a 2nd printing of the LEVEL button you can access the
Mic/Aux/CD Input Levels
screen. This is where you arrange your input levels for the
Mic
input,
Aux
input and
CD
input, displayed as a dynamic bar. Navigate from tab to tab by pressing the L and R Arrow buttons. Set
Input
levels past turning the wheel equally you monitor each respective
Input.
|
AUX |
|||||||||||||
|
MIC |
CD |
||||||||||||
|
-40 |
-xx |
||||||||||||
|
-lxxx |
-60 |
-0 |
|||||||||||
 +0
+0
dB

•
When setting levels for the
Mic,
Aux
or
CD
inputs, make sure you first press the
RECORD SELECT
push button and toggle it to
Mic/Aux.
•
The dB display on the lower left of the LCD indicates your input level trim setting. You can set it anywhere from
-60dB
to
+12dB, or set it to
Off.
When you plan on recording from one of the
Mic,
Aux
or
CD
inputs, make sure you first press and hold the
RECORD SELECT
push to select the desired
Input Routing. You tin can cull between mixing your input with the
Microphone
or
Guitar
track.
Updated Features
Menu Items
Here are some new bill of fare items that have been added since the initial Spider Jam release:
Save Recording To SD Card –
this command enables you to save the currently loaded recording to your SD card. Press the
Salve
button to access it in the bill of fare listing.
Save RecordingTo Internal –
this command enables you to save the currently loaded recording to internal memory. Printing the
Salve
push button and plow the bike to access it.
Erase All Internal Recordings –
when you take all your recordings backed up to an SD carte du jour, you tin clear Spider Jam’s internal memory by invoking this command.
Output Routing –
printing the
SETTINGS
button iii times then turn the cycle to
1•3
navigate to this menu particular.
Normal
fashion is the default. When you select
Functioning
Mode, your guitar will play only thru the Spider Jam’s 12 inch speaker.
OUTPUT ROUTING
NORMAL

ALL Sound TO RCA AND PHONES

It’due south important to note that if yous plug in your headphones, the Spider Jam reverts to
Normal
routing, and your guitar goes to all outputs. You can manually change the routing dorsum to
Performance Way, but it’s unlikely yous’ll desire to do then while wearing headphones.
Also go on in listen that
Master Volume
volition command the level of the
RCA Outs
when headphones are plugged in. When headphones are unplugged,
RCA Outs
are unaffected past
Master Volume
command, so they put out 100% level, independent of output routing.
Tempo/Pitch Modes –
press the
SONG
push twice to admission
Tempo/Pitch Modes.
Asdescribedonpage3•ane,thisiswhereyoucanselect
Time Stretching And Pitch Shifting
or
Varispeed. Press the R Arrow, then turn the wheel to select the mode you lot desire.
TEMPO/PITCH MODES
|
LOOPING |
[ON] |
[ON] |
||
|
ENDLESS |
PLAY |
[ON] |
[ON] |
Looping –
Looping for ‘ane shot’ Guitar & Aux tracks can now exist ready to On or Off for playback and recording. Printing
SONG
button twice to access the
Looping
menu item.

Updated Features
Jam Control Mode
If you lot toggle the
SETTINGS
button and gear up the
FBV Mode
menu detail to
Jam Control, you can control recording functions using an FBV. All Amp Model and FX controls on the Spider Jam volition notwithstanding exist available, too as the four buttons, wheel and four-way navigator.

 Due east

i•4

 A
A


 B
B


 C
C


 D
D

In
Jam Control Fashion,
Bank Upwardly/Downwardly and the FBV aqueduct switches operate as follows:
A
Record/Overdub –
footstep on
Record
to begin recording your loop. If you start with a Song or Drum countoff, recording begins after the count. If y’all punch in while a track is playing, recording begins on the nearest beat. Overdub on an existing track at whatsoever time.
B
Play/Stop –
this switch simply plays or stops your loop. On your first laissez passer, when you initially record your loop, hit
Stop
also sets your loop out-point.
C
Disengage/Clear –
footstep on this switch to disengage your last recorded take. To clear a track, press and hold for a few seconds, then select
Clear
in the LCD and printing
Disengage
once more.
D
i/two Speed –
step on this switch to play your loop at 1/2 speed. Press information technology again to toggle dorsum to normal speed. If you overdub a guitar track at i/ii speed, then toggle playback to normal speed, your overdub will play back an octave higher.
E
Banking concern Up/Down –
Bank Up
loads the next internal recording;
Depository financial institution Down
loads the previous 1. The current recording proper name will exist displayed in the FBV display.
*Note: When an SD track is loaded for playback and overdubbing, Bank Up/Down volition replace information technology with an internal recording, so be sure any SD track changes are saved.
SD Card Details
SD Card
Details
In this chapter we’ll focus on the SD card. With an SD carte inserted in your Spider Jam’south SD carte slot, you lot can save and load your original recordings, perform mixdowns in WAV file format, import WAV files from your figurer, and upgrade Spider Jam firmware.
|
All the SD bill of fare-specific carte du jour items described in this chapter are accessed by pressing the |
2•1 |
|
Salve |
Format Carte du jour
Information technology’s best to start out with a new 1 GB or 2 GB SD card. If y’all accept an existing card, that’ll piece of work fine, just make certain you’ve backed up whatever saved files on the carte first, considering when you lot format your card, all your files will be erased. The main reason to format your SD menu is to ensure your carte du jour is prepare with the JM4 filing system. It’due south also a good style to go a fresh starting time in organizing your sessions. To format your SD card, follow these steps:
•
Insert an SD card (up to two GB) into the SD card slot on the Spider Jam rear panel.
•
Press the
Salvage
button; y’all’ll run into a list of menu items in the LCD.
•
Plough the wheel and navigate to
Format Menu, and then printing the R Arrow to format.

IMPORT WAV FILE FROM CARD
FORMAT CARD
FIRMWARE VERSION
•
Press the Up Pointer to confirm “
Yes”. The format procedure will take a few seconds.
•
When the format process is complete, press whatsoever push button to brainstorm a new session.
As you begin recording with Spider Jam, earlier you know it you’ll find yous’ve accumulated quite a few recordings. Since internal retentiveness is limited, you lot’ll want to develop a adept arrangement for backing them up, for beginning new sessions with a clean slate, and for importing WAV files from your estimator. With that in mind, hither are three expert rules to go by:
•
Use an SD menu as your primary memory banking company to keep internal retentivity freed upwardly.
•
Back up every session of internal memory recordings to SD card.
•
For maximum recording time, begin every new session with JM4 retentiveness cleared.
