

How to Scan From Printer to Pc
Even in this day and age where almost everything is online and virtual, information technology still can’t be helped that y’all will go some physical documents. And the best way to preserve these documents is to scan them and relieve them on your hard drive, cloud storage, or NAS.
To do so, you need a multifunction or all-in-one printer. However, these devices tin can exist disruptive to set up and use. They often require different apps and drivers, even if y’all’re using other models from the same maker.
Luckily, both Windows and Mac allow you to do it easily. Here’s how.
Scanning on Windows
If you’re a Windows user, your computer will automatically find your device in one case it’s plugged in via the USB port. Whether your printer is a wireless or network device, Windows will automatically detect information technology, provided information technology’s connected to your network or to the estimator’south Bluetooth connexion.
However, if your computer doesn’t detect it, you lot volition have to set the machine upward manually.
Manually Adding a Printer
Before starting this process, yous must ensure the following: your printer has power, is turned on, and is connected to your computer. If you accept a network or wireless printer, you should also check if it’s continued to the same network that your computer uses.
Once y’all’ve double-checked the above, endeavour to restart your printer and run across if your computer will detect it at present. If information technology still doesn’t, and then let’due south proceed with adding your printer manually.
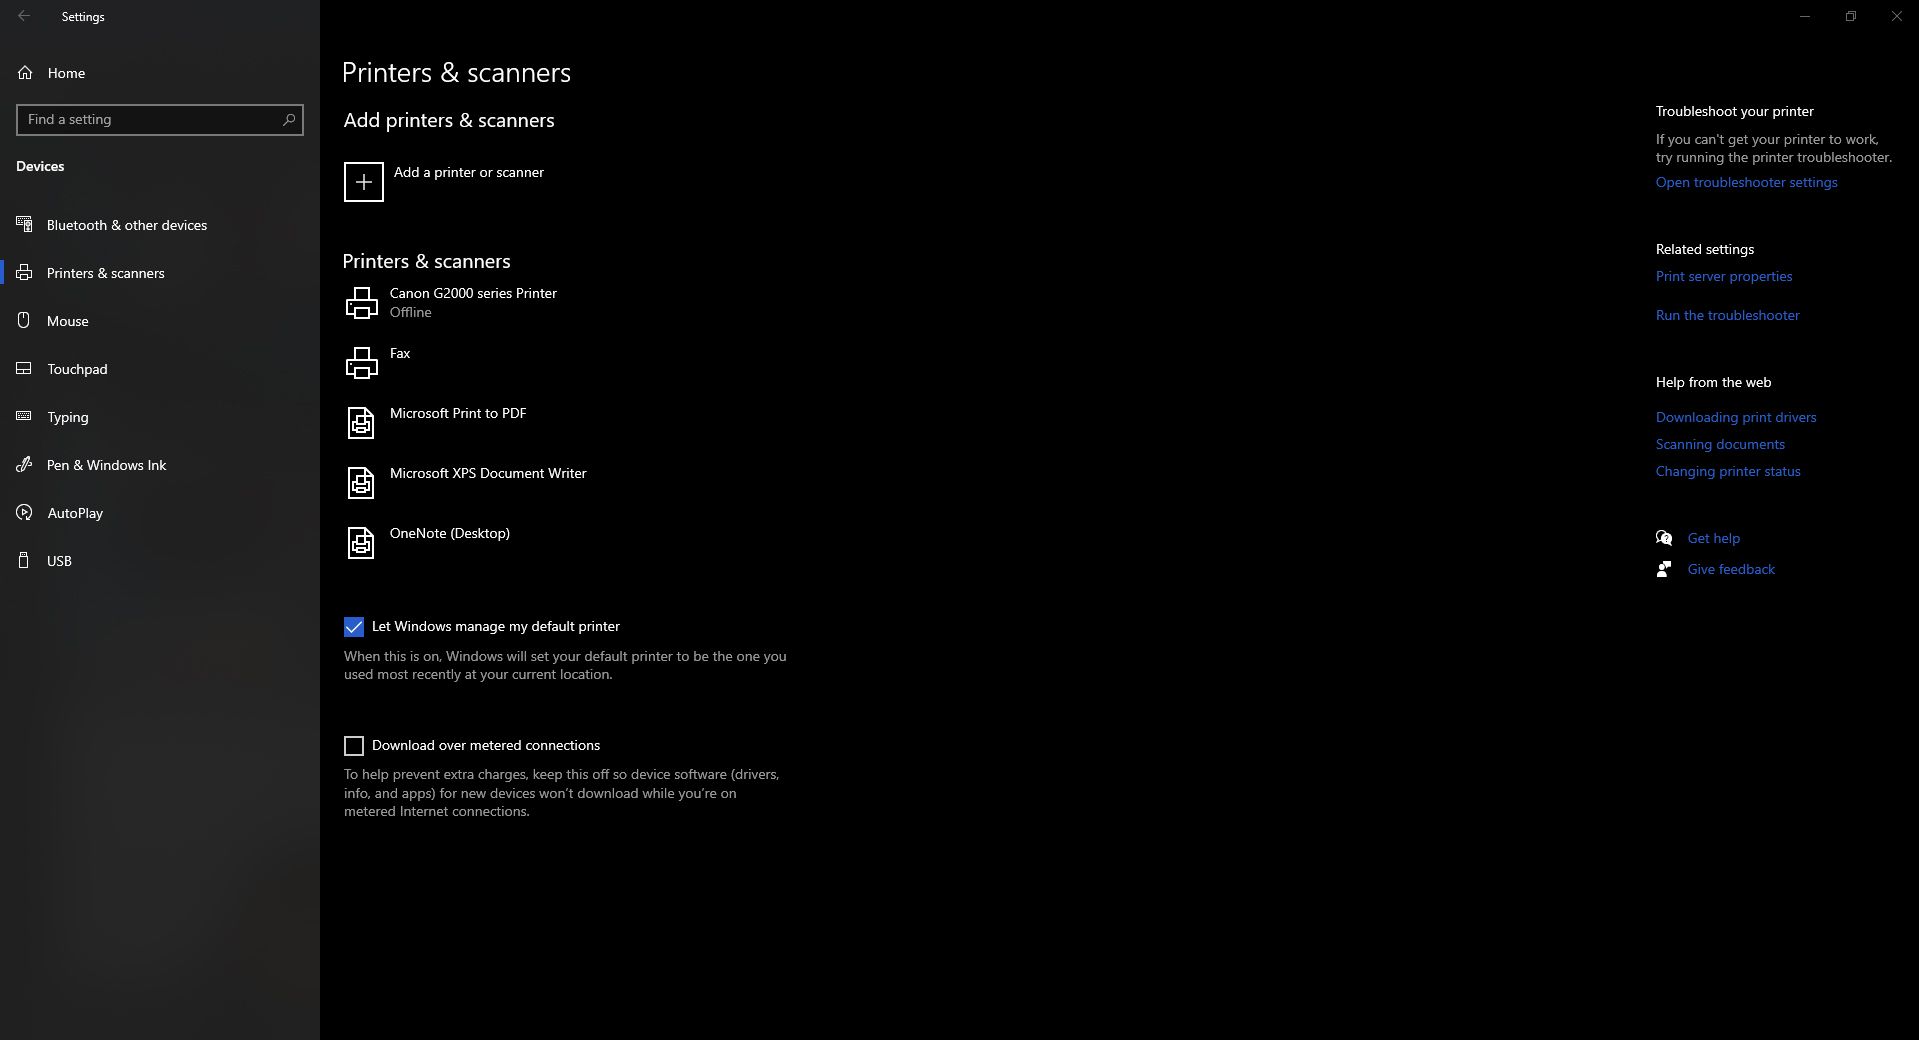
First, click on the
First
button, and then get to
Settings. In the Settings window, become to
Devices
>
Printers & scanners. Under the
Add printers & scanners
department, select the
Add a printer or scanner
push. Await for the computer every bit it tries to find nearby devices, both connected directly to your computer or via the network.
One time your computer detects all nearby devices, select the one you lot want to utilise and click on
Add device. It will and so automatically add your machine, and you can cull it from your scanning options later.
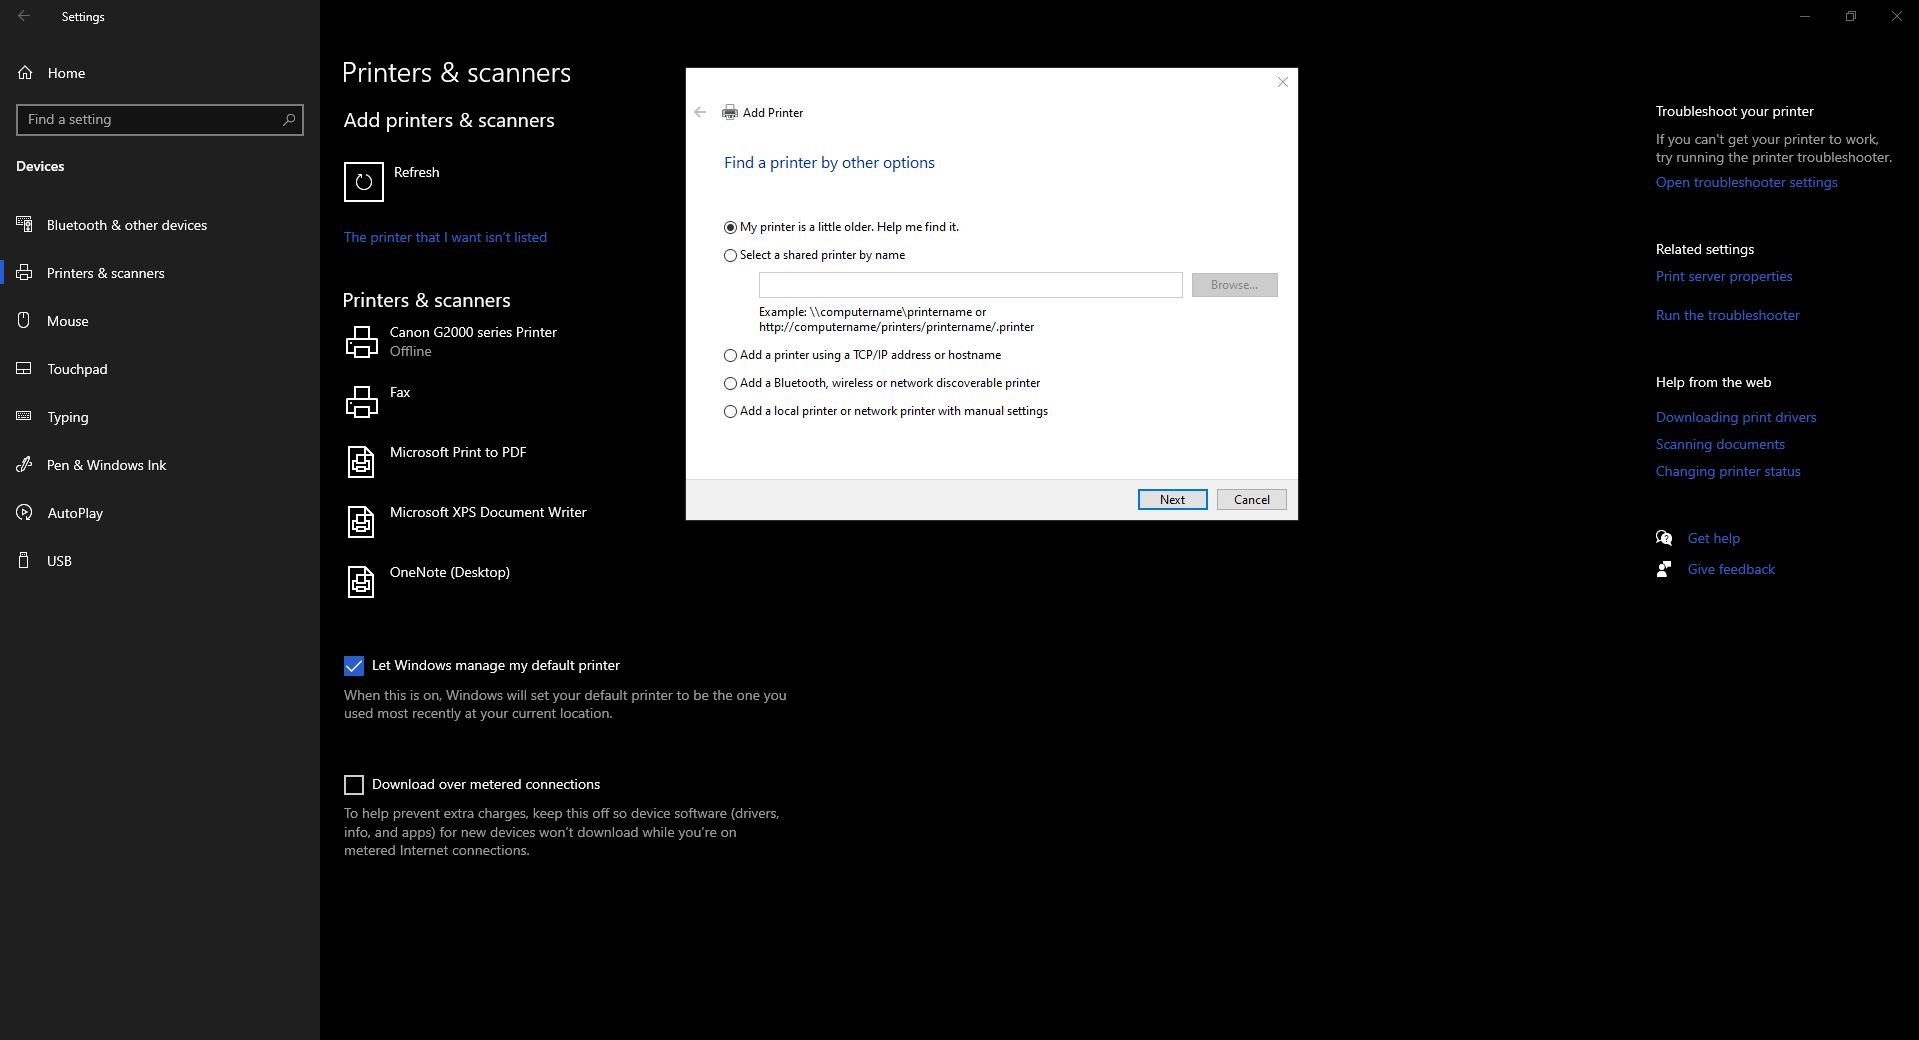
However, if that doesn’t happen, click on
The printer that I want isn’t listed
link. Windows volition then open a wizard to add together your printer. Simply follow the instructions to install your device.
Once you’ve added the hardware, you can open the apps to offset your scan. Windows offers two means of scanning documents; the first is the legacy
Windows Fax and Scan
app, and the second is the newer
Windows Scan
app. We will tackle both below.
Windows Fax and Scan
Click on Start, then get to
Windows Accessories
>
Windows Fax and Scan
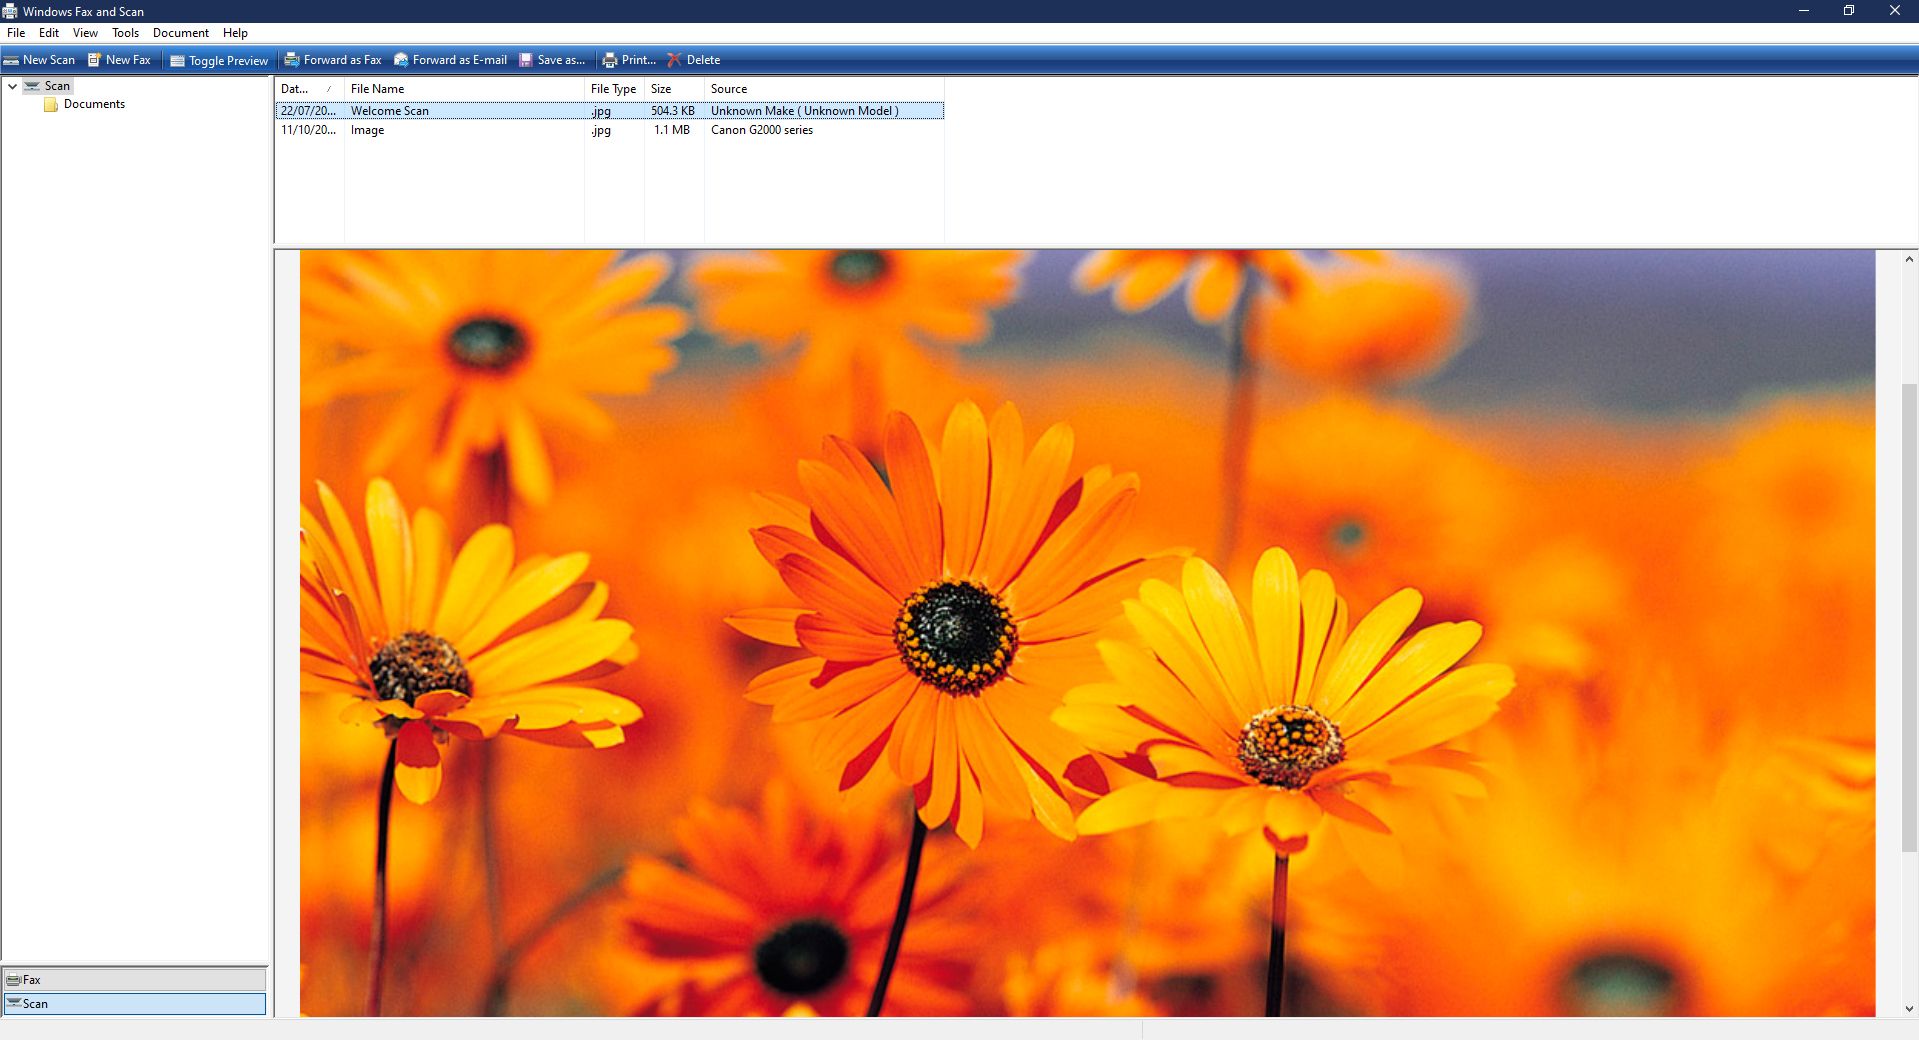
to admission the app. In the Windows Fax and Scan window, select
New Browse. A New Scan window will then announced. Ensure y’all’ve chosen the correct device nether
Scanner. Otherwise, click on
Modify…
to pick the right one.
Once you’ve picked your device and have fix your scan settings, click on
Preview
to commencement scanning and run into how your document will announced. And one time you lot’re happy with the results, click on
Scan
to scan and save the paradigm.
The saved image will so appear in the main window of the Windows Fax and Scan app. If y’all want to access the file, it’s usually saved in your
Documents
>
Scanned Documents
folder.
Windows Scan
This app isn’t unremarkably pre-installed in Windows. You kickoff demand to go to
Microsoft Store, search for Windows Browse, then download and install it. In one case information technology’s set upwards, launch information technology from your
Start Menu
by clicking on
Browse.
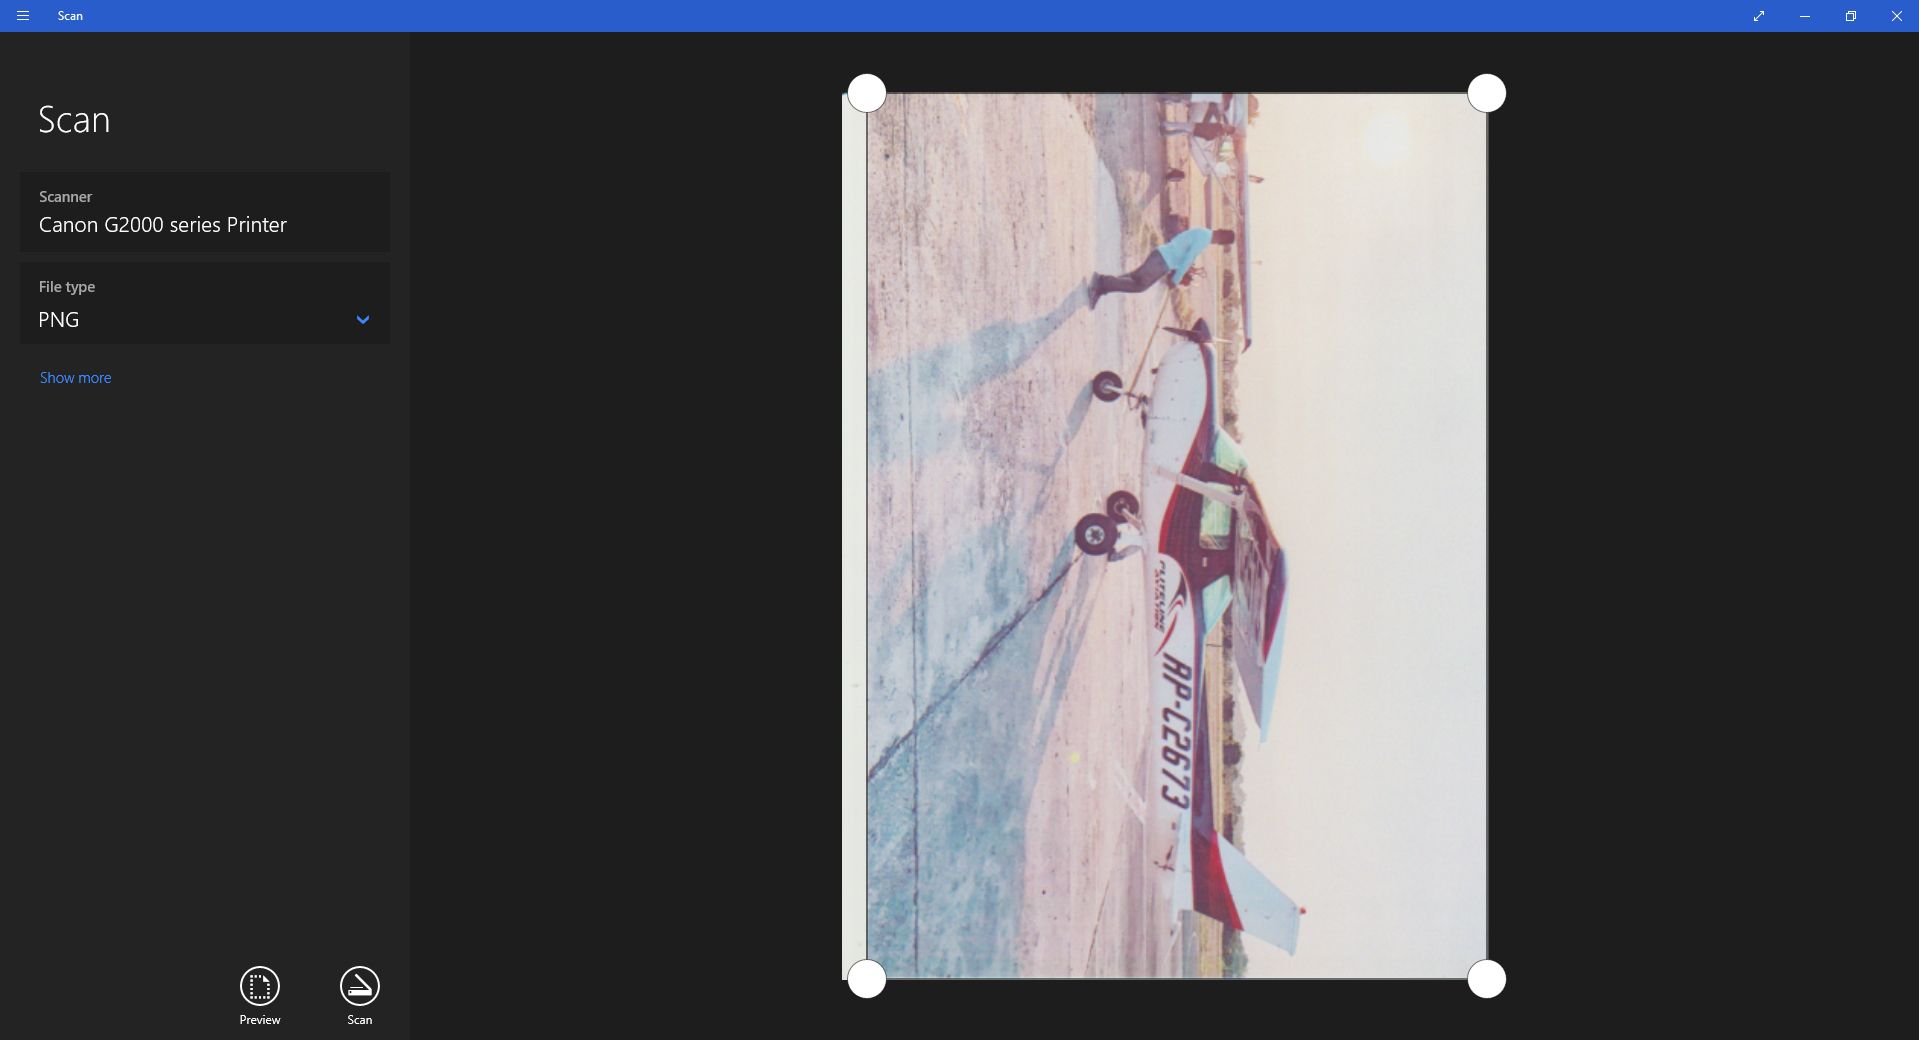
A new
Scan
window will announced. If you lot have multiple scanners, pick out the correct device, select the
File type
yous want to save your scan, and so press
Preview. Yous will and so come across your browse in the primary window. You can also suit the edges of your file by dragging and dropping the white circles at the corners of your file.
Once you’ve finalized your settings, click on
Scan. Afterward your file is scanned, the app will testify a pop-upward at the summit of the window telling you the file name of the scan and where it’s saved. Click on
View
to open the file in a photo app, or press
Close
when you’re washed. You tin can admission the saved file in your
Pictures
>
Scans
folder.
Scanning on a Mac
If you have an Apple computer, you tin likewise scan from any multifunction printer using your device. First, become to
System Preferences
>
Printers & Scanners
to cheque if your multifunction printer is installed on your system. You should see it listed in the left cavalcade; otherwise, y’all need to add it.
Adding Your Printer
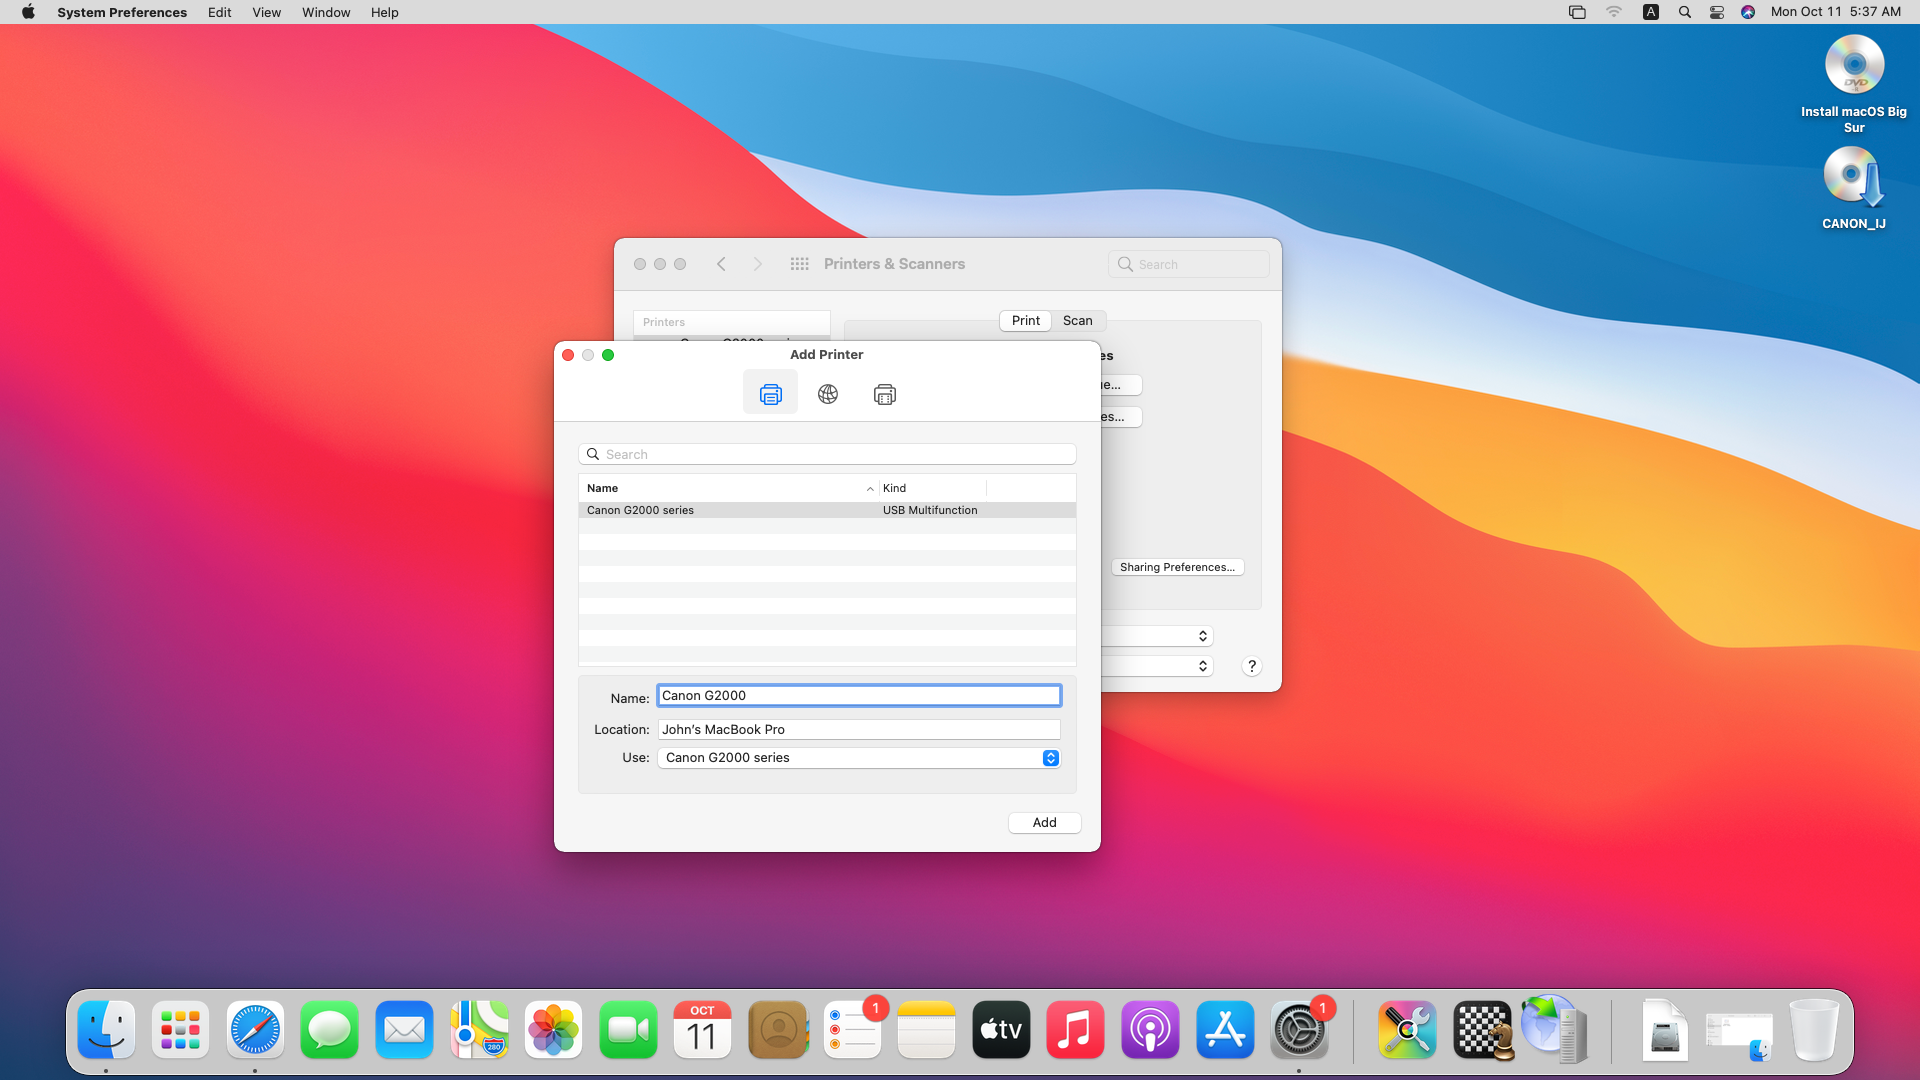
To do so, click on the
+
sign. An
Add together Printer
window will and so appear. If you’re using a USB printer, it should appear automatically listed in this window. But if yous’re using a network printer, you should click on the
IP
icon and set it upwards using its network address.
Withal, if your device is still not found in the Add together Printer window, you take to visit your printer brand’s website and download the pertinent drivers.
Starting Your Scan
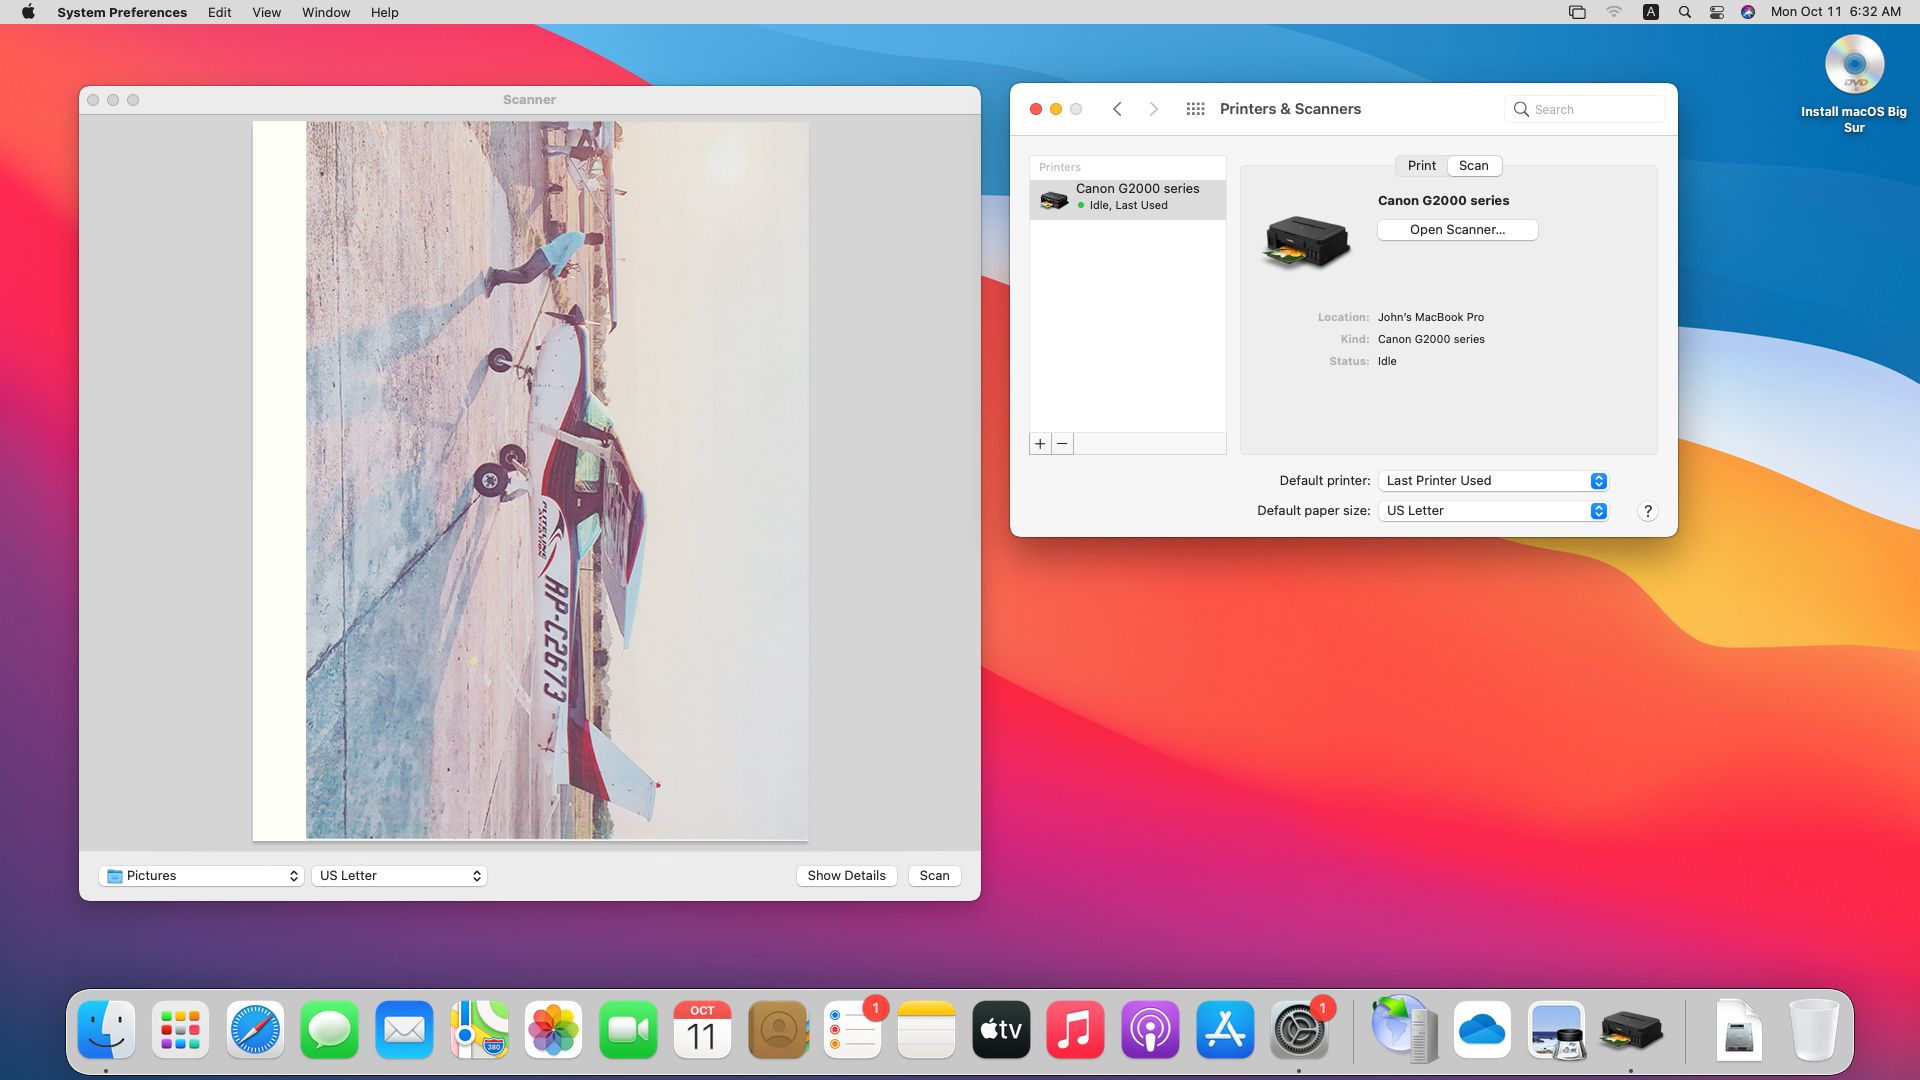
Once your device is installed on your Mac, go back to
Printers & Scanners. Select the device you lot want to use, then click on the
Scan
tab. You should come across your device’due south name in the main window, then underneath it, click on the
Open Scanner…
button.
A
Scanner
window volition then open. In the lower bar,
select the folder
where you want to save your scanned file,
choice the paper size
of your document, and so printing
Scan. The printer will first execute a preliminary scan to make up one’s mind the docs it’southward working with. It volition then scan each certificate it detects and save information technology as a split file.
To find the file you’ve recently scanned, caput to the binder you’ve selected in the previous paragraph.
Digitizing Your Life
Information technology’south definitely a good idea to keep digital copies of your most of import physical files. These could be your birth certificate, property titles, and contracts. That way, fifty-fifty if y’all lose the original certificate, you still have admission to their copies for your reference.
Even so, wherever y’all’re storing these copies, e’er ensure that it’southward in a safe place. If y’all’re saving it on your computer or a cloud storage service, ensure information technology’due south encrypted. And if yous are keeping it on an offline server, secure those drives in a locked condom. That style, your most precious belongings, like your identity, cannot exist easily stolen.
