

How to Connect Hp Deskjet 1510 Printer to Laptop
This document is for the post-obit printers: HP Deskjet 1510, 1511, 1512, 1513, 1514, 2540, 2541, 2542, 2543, 2544, 2546, 2546B, 2546P, 2546R, 2547, 2548, and 2549; and Deskjet Ink Reward 1515, 1516, 1518, 2545, 2546, and 2548 printers.
Unbox and plow on your new printer, install the ink cartridges, load the paper tray, and and then install the impress commuter on the computer.
annotation:
If y’all are looking for the printer software, go to:
Video of setting upwardly the printer
The post-obit video demonstrates how to gear up up the concrete parts of the printer.
annotation:
This video shows the HP Deskjet 1510 All-in-I printer, but the steps are the same for your printer.

Step ane: Cheque the contents of the box
The contents might vary past country/region. See the packaging for a list of items shipped in the box.
Step 2: Unpack the printer
-
Remove the printer from the box.
-
Remove the tape and packing material from the outside of the printer.
-
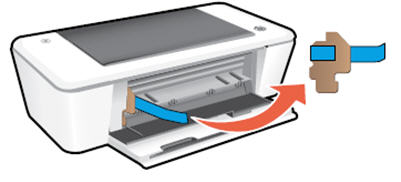
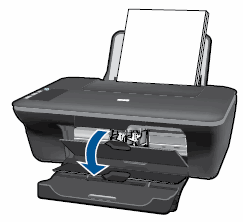
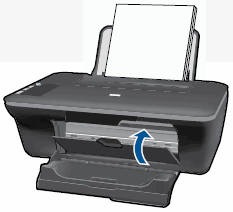
Open the output tray, and and then open the cartridge access door.
Figure
: Open the output tray and cartridge admission door

-
Remove the tape and cardboard from inside the printer
Figure
: Remove the packing materials from inside the printer
-
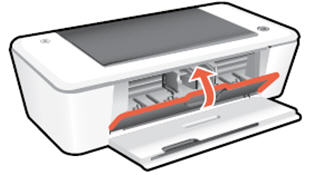
Shut the cartridge access door.
Figure
: Close the cartridge access door
-
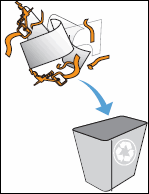
Recycle the packing materials.
Figure
: Recycle the packing materials
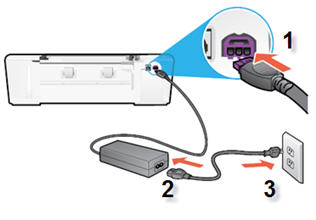
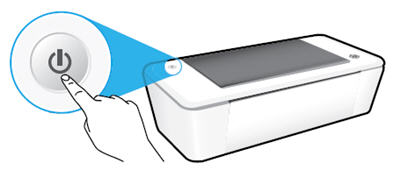
Step 3: Connect the ability string, then turn on the printer
Important: Your printer might take a protective plastic sticker that looks similar an agile printer control panel. Remove the sticker from the control panel before you continue with this step.
-
Connect the cord from the adapter to the rear of the printer.
-
Connect the power cord to the ability adapter, and then plug the power cord into an electrical outlet.
-
Connect the string from the adapter to the rear of the printer
-
Connect the ability string to the adapter
-
Plug the power cord into the electrical outlet
Effigy
: Connect the power cord
-
-
Press the Power button to plow on the printer.
Figure
: Plow on the printer
Pace five: Install the cartridges
-
Open the cartridge access door. The carriage moves to the center of the printer. Expect until the printer is idle and silent before continuing.
Figure
: Open the cartridge admission door
-
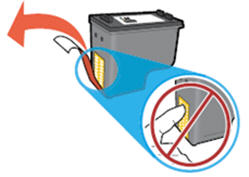
Remove the new cartridge from its packaging, and then pull the orange tab to remove the plastic tape.
caution:Practise not touch the copper-colored contacts or the ink nozzles. Touching these parts tin can outcome in clogs, ink failure, and bad electric connections.
Figure
: Remove the plastic record
-
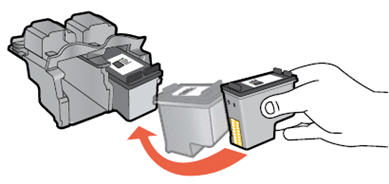
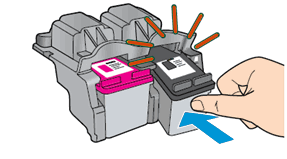
Concord the cartridge by its sides with the nozzles toward the printer, and then insert the cartridge into its proper slot.
-
The tri-color cartridge (
 ) goes in the slot on the left.
 -
The black cartridge (
 ) goes in the slot on the right.
Figure
: Insert the cartridge into its slot
-
-
Push the cartridge forward into its slot until it snaps into place.
Effigy
: Snap the cartridge into identify
-
Repeat these steps to install the other cartridge.
-
Close the cartridge access door.
Effigy
: Close the cartridge access door
-
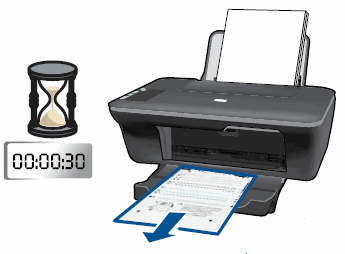
Expect nigh xxx seconds for the alignment folio to automatically print.
Effigy
: The alignment page prints automatically afterward xxx seconds
note:
The printer prints an alignment folio automatically merely when a
new
cartridge has been installed.
Step vi: Marshal the cartridges
Step 7: Install the printer software
Your HP printer hardware is at present set upward and you can install the press software. Practise not try to connect the printer to a computer until instructed to do so in the printing software.
Download the latest version of the printing software from the following HP websites:
