

How Do I Get My Hp Printer to Print Borderless
You tin print your photos with no margins, extending the paradigm all the mode to the
edges of the page. Although borderless press is a bit slower, yous go cute snapshots and enlargements, without trimming.
Run across
Loading Paper for Borderless Photos, then run into these sections for instructions:
|
Type or Media |
||
|
Ultra Premium |
||
|
Super B |
Premium Photo |
|
|
Super B |
||
|
Super B |
Presentation Paper |
|
|
Epson Premium Photo Paper |
Super B |
Premium Photograph |
|
Super B |
Ultra Premium |
|
|
Epson Ultra Premium Presentation |
Super B |
Ultra Premium |
|
Super B |
Premium |
You lot can purchase 18-carat Epson ink and newspaper from an Epson authorized reseller. To
find the nearest reseller, call 800-GO-EPSON (800-463-7766). Or yous tin can purchase online at
world wide web.epsonstore.com
(U.S. sales) or
www.epson.ca
(Canadian sales).
Notation:
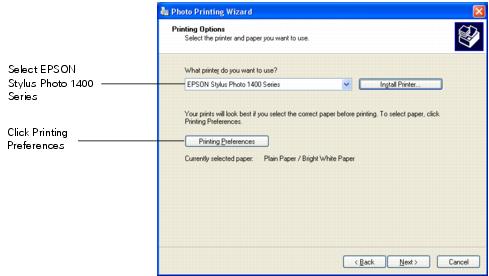
In Windows Vista®, you can select a photograph on your system and click
Print. Then select your printer, newspaper size, and type on the next screen. To select the rest of your print options, click
Options
at the bottom of the screen and select
Printer
Properties. And then continue with
step 7.to select the necessary options and click
OK. Follow the on-screen instructions to print your photograph.
|
4. |
Click |

|
6. |
Select |

|
7. |
Select |
|
9. |
Click the |
|
xi. |
Select |
|
12. |
Click the |
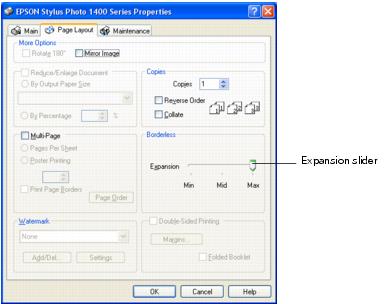
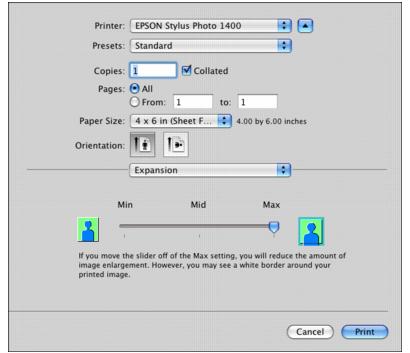
Min
retains the entire epitome in your impress, simply in that location may exist a small white border on the borders of the print.
Max
expands the image to ensure that in that location are no unprinted edges, but the edges of the image may not appear in the print.
|
fifteen. |
Click |

|
sixteen. |
Select |
|
2. |
Open the |
|
3. |
Make sure |
|
4. |
Click the |

|
5. |
Select |
|
7. |
Click the |
|
9. |
Select |
|
x. |
Click the |

Min
retains the entire image in your print, just there may be a small white edge on the borders of the print.
Max
expands the image to ensure that there are no unprinted edges, but the edges of the paradigm may not appear in the print.
|
3. |
Click the |
|
4. |
Select |

Note:
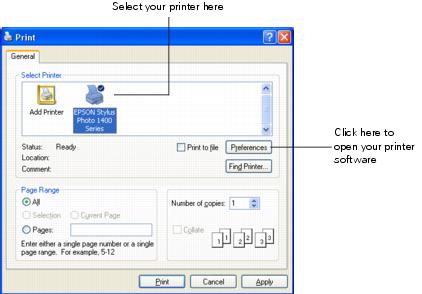
If you don’t encounter these settings in the Print window, bank check for them in your application before press. For case, you may be able to select them past opening the
File
card and selecting
Page Setup.
Note:
If you lot don’t run across these settings in the Print window, check for them in your application earlier press. For instance, you may be able to select them past opening the
File
card and selecting
Page Setup.
|
seven. |
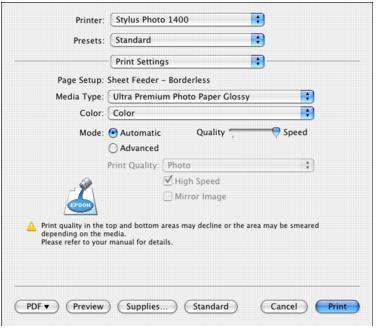
Select |
Note:
In certain programs you may need to select
Avant-garde
before you lot tin can select
Print Settings.

Annotation:
The automatic photo correction feature is not available with Macintosh.
|
9. |
Select |
|
10. |
Select |
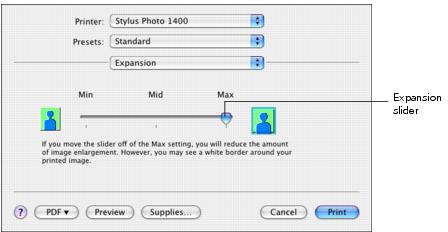
Min
retains the entire image in your impress, simply there may be a modest white edge on the borders of the print.
Max
expands the image to ensure that there are no unprinted edges, only the edges of the image may non announced in the print.
|
12. |
Click |
|
2. |
Open the |
|
iii. |
Select |

|
8. |
Select |
|
ix. |
Select |
Note:
In sure programs yous may need to select
Advanced
before you tin can select
Impress Settings.
Note:
The automated photo correction characteristic is not available with Macintosh.
|
11. |
Select |
|
12. |
Select |
Min
retains the entire prototype in your print, only there may be a small white border on the borders of the impress.
Max
expands the image to ensure that there are no unprinted edges, but the edges of the paradigm may not appear in the print.
|
14. |
Click |
The special Epson Claria inks designed for your printer provide the ultimate
combination of photograph quality and longevity when printed on Epson papers and properly displayed or stored. For best results, always use Epson papers.
With proper care, photographs from your
Epson Stylus Photo 1400 will last for many years. Equally with traditional photos, Epson recommends the following to minimize color changes and lengthen display life:
