

Flashing New Firmware to the Gd-77 ]
Update 10/3/2021
The firmware and related files are back online and can be accessed at
https://www.opengd77.com/downloads/. I will work to get all the links updated in this article.
The Radioditty GD-77 is a popular entry level DMR capable radio with a reasonable price point. However the default firmware/software is not really geared towards amateurs, specially if you lot have a ton of repeaters you want to load onto the radio.
Enter the OpenGD77
firmware
and
CPS
written by Roger Clark. It’s a complete overhaul of the firmware and offers a bunch of features not found in the original firmware while removing the unnecessary ones (like encryption). If yous are going to be using a GD-77 as a ham you need to utilize this firmware.
The
User Guide
for OpenGD77 is excellent and I would recommend giving information technology a read but I wanted to brand a post specifically well-nigh upgrading the firmware on the radio and then one doesn’t have to become hunting through the user guide.
Prerequisites
- A Radioditty GD-77 running the latest official firmware
- The Radioditty programming cable
- A Windows estimator
- Verified working on Windows 10
- An Amateur radio license and DMR Radio ID
Before getting into the nitty gritty of everything allow’s outset make sure that everything nosotros demand is downloaded onto the figurer. This includes both the official firmware too as the OpenGD77 Firmware and CPS.
Official Firmware:
https://www.radioddity.com/pages/radioddity-download
OpenGD77 Firmware:
https://opengd77.com/downloads/releases/
(Navigate to folder with latest appointment -> Firmware -> OpenGD77.bin)
OpenGD77 CPS:
https://opengd77.com/downloads/CPS/
OpenGD77 FirmwareLoader:
https://opengd77.com/downloads/releases/
(Navigate to folder with latest date -> sources_and_tools -> OpenGD77_FirmwareLoaders.zip)
I’d recommend not installing the pre-release/development versions until you’re comfortable with the installation and use of the CPS and firmware. I never really ran into any bug with the stable releases.
CPS Installation
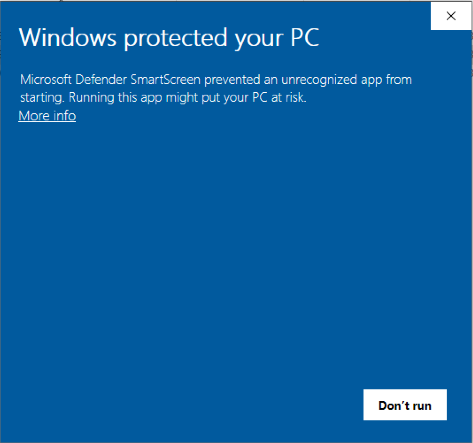
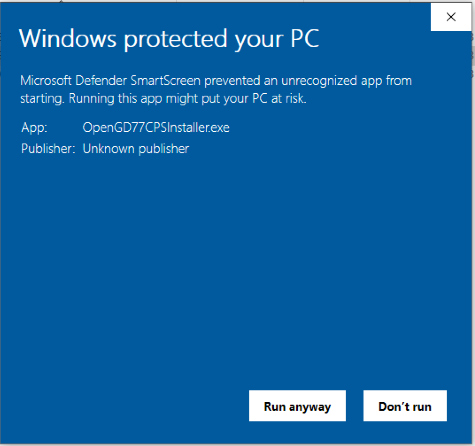
First we’re going to become the OpenGD77 CPS installed which will also install the necessary drivers. You may get a Microsoft Defender SmartScreen warning which can be safely ignored. To get past it click More Info and choose Run Anyway.
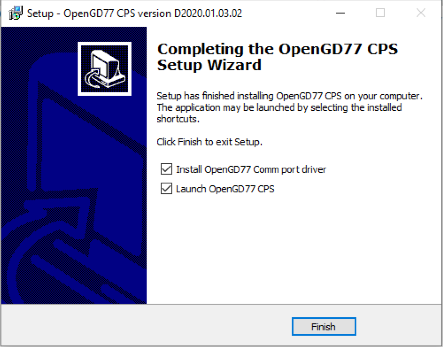
Click through the popular-up and keep with the installation. You tin choose to install it in whatever folder you lot want but make sure when you get to the end of the installation to choose
Install OpenGD77 Comm port driver.
You don’t have to launch the CPS at this time only if you want to you can.
Updating Official Firmware
As of the fourth dimension of this mail the latest official firmware is v4.3.6. Y’all can check this on your radio by going into the card (green push) then
Set -> Radio Info -> Dev. Info
and then scroll down to
Soft-Version. If the latest official firmware you can download and the version on your radio match and then you’re good to skip this section. Otherwise read on.
Start plug in your radio and get it into DFU manner by pressing the S1 and Fn buttons downward and turning the radio on. Those are the two buttons below the PTT button. If you did this correctly the screen will be blank and the LED volition be lit upwardly green.
Unzip the file you downloaded from Radioditty, open it in Explorer and follow this binder navigation:
$Date GD-77 CPS and Firmware Changelog -> Firmware Software $version -> Update Software -> Eng $version
and you should see something like this.
Run the Update.exe program
as an Administrator.
I don’t know why but I ran into a lot of problems updating firmware if I didn’t run the updater equally an admin. It should choose the correct COM port for you but if you lot have multiple devices using COM ports you’ll demand to select the right one. For me it’s COM1.
Click the Browse push and navigate to the sgl file, it should be two directories upwards. Then printing the Download push button which will ship the file to your radio. Information technology should look something like this.
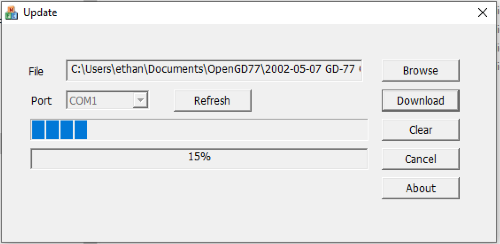
Wait until yous see the Update Success popup and then y’all can shut out of the application. Power bicycle your radio and verify that the firmware has been updated.
Upgrading to OpenGD77 Firmware
Now that you’re on the latest official firmware you lot can upgrade to the OpenGD77 firmware. You can apply either the FirmwareLoader.exe standalone program or the CPS to update the firmware. I’ll run through each below.
Much like before plug in your radio and go information technology into DFU mode past pressing the S1 and Fn buttons down and turning the radio on. Those are the two buttons beneath the PTT push button. If y’all did this correctly the screen will be blank and the LED volition be lit up dark-green.
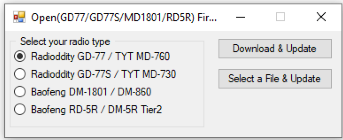
Run FirmwareLoader.exe
every bit an Administrator.
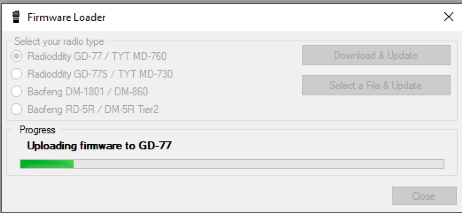
Choose your radio type (GD-77) and select either
Download & Update
or
Select a File & Update.
If you choose the Download selection information technology volition automatically download the latest stable version and install it for y’all. Otherwise navigate to the firmware file you downloaded.
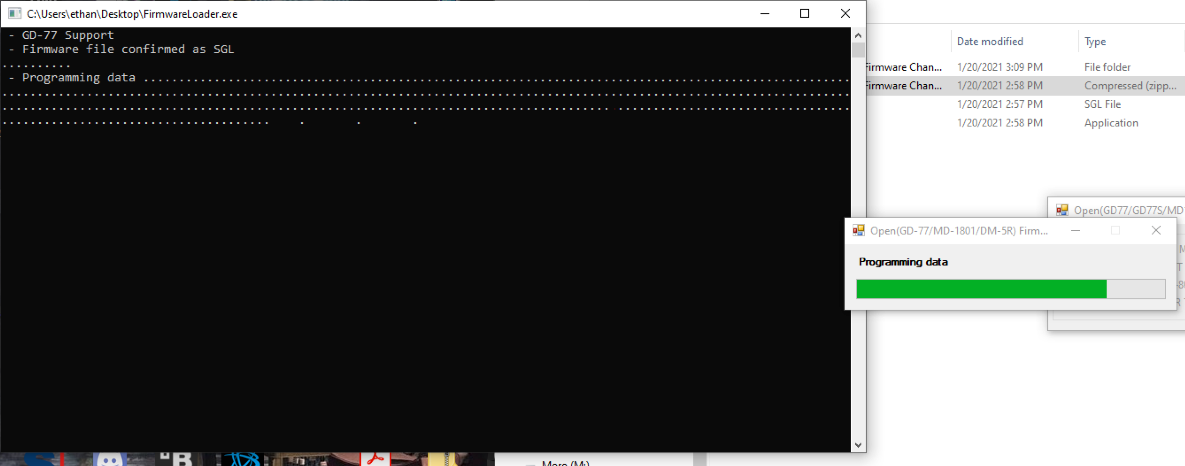
This procedure should simply have a minute or two and when it’s finished ability cycle the radio. Verify the firmware version past going into the carte du jour (green button) and navigating to Firmware Info in the menu.
The process using the CPS is like. After getting the radio into DFU mode run the OpenGD77 CPS
as an Administrator.
It will either open up a blank codeplug or whatever codeplug you last had open.
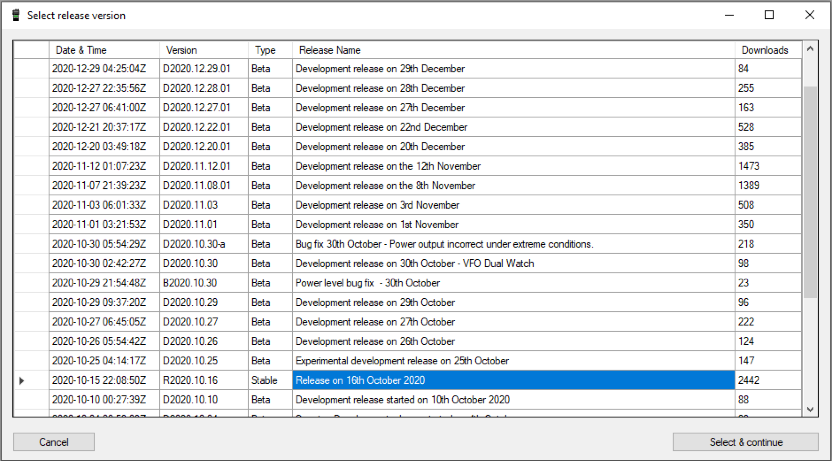
Navigate to Extras -> Firmware Loader and cull your radio version. In this case select
Download & Update.
Navigate to the latest
Stable
version and choose
Select and Continue.
Like before this procedure should only take a minute or 2 and when information technology’south finished ability bike the radio. Verify the firmware version by going into the carte du jour (green button) and navigating to
Firmware Info
in the card.
Next upwards is an extremely important part that you must not skip.
Backing Up The Important Bits
Before doing annihilation else you need to dorsum up the “important bits” of your radio and put them somewhere rubber. This includes the EEPROM, the Flash and the MCU ROM. If you lot don’t dorsum these up you may not be able to go back to the “stock” firmware.
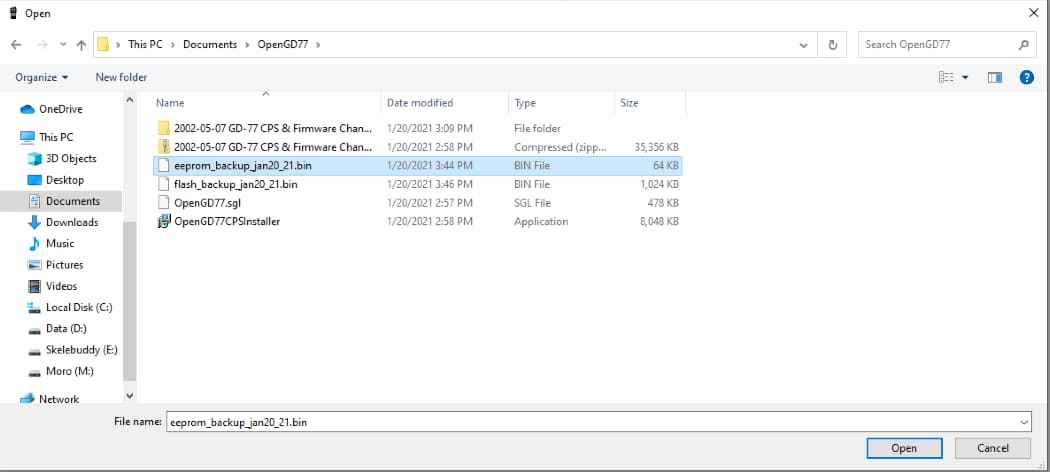
Plug in your radio, turn it on and change to a channel that isn’t in use. Open upwardly the OpenGD77 CPS and navigate to
Extras -> OpenGD77 Support. It should expect something similar this.
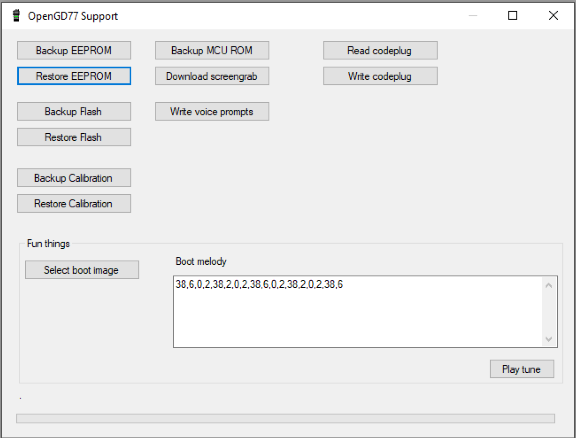
Select Backup EEPROM and when it finishes select a location for the saved file. Requite information technology unique name with the date you backed it upward. Practise the same thing with the Flash and MCU ROM.
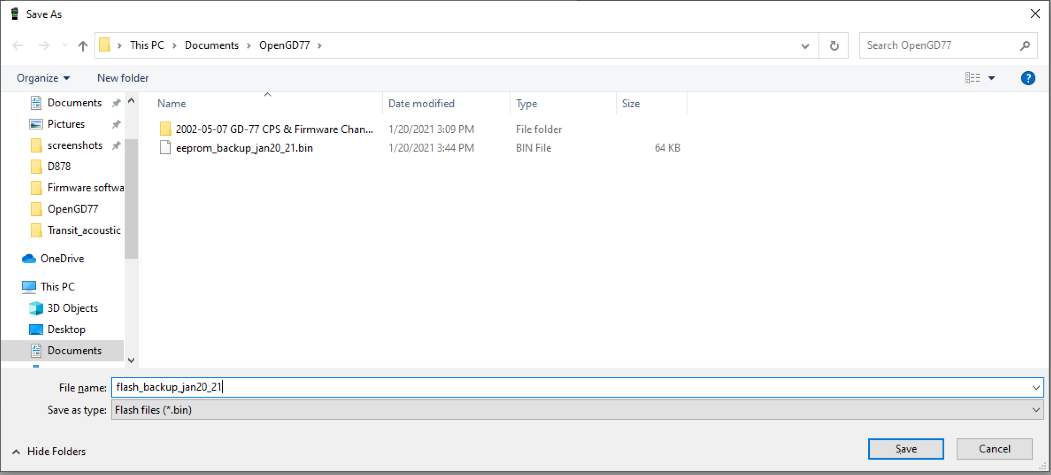
Put these files somewhere prophylactic like on a network bulldoze or Google Drive or OneDrive or something similar. You don’t desire to lose them in case you need them.
Downloading a Clean Codeplug
Earlier making any changes to the radio with either a codeplug yous downloaded from the cyberspace or building your own I would recommend downloading the data from the radio and creating a “clean” codeplug. Sometimes things can go weird with a codeplug and having a make clean one you can load to reset things tin can exist helpful.
Thankfully the process is pretty simple. Plug in your radio, plough it on and switch to a channel that isn’t in use. Navigate to
Program -> Read
or press
Ctrl-R. This will read the data from the radio into the CPS. Y’all can then save this codeplug out somewhere condom if you need it after.
Side by side Steps
From here yous can start building your own codeplug based off the “clean” ane or y’all can load a codeplug you’ve downloaded. I created a variation on the codeplug that K1ST created and it can be establish
here. His original version can exist institute
hither
likewise.
Mine contains the NEDECN DMR repeaters and some analog repeaters in the area. The zones are carve up up by state and include all possible talkgroups for each country. Refer to published TG lists for your repeaters. Experience costless to modify this codeplug every bit well!
If you are using an external codeplug make certain you change the
Callsign
and
Radio ID
from whatever it is in the codeplug. Y’all should also brand sure y’all prepare these values if y’all are building your own.
If you don’t take a Radio ID delight sign upwardly at
https://www.radioid.net/#! and get your ain before continuing. This requires a valid apprentice radio license.
For assistance with programming and using the radio please refer to the official User Guide linked above.
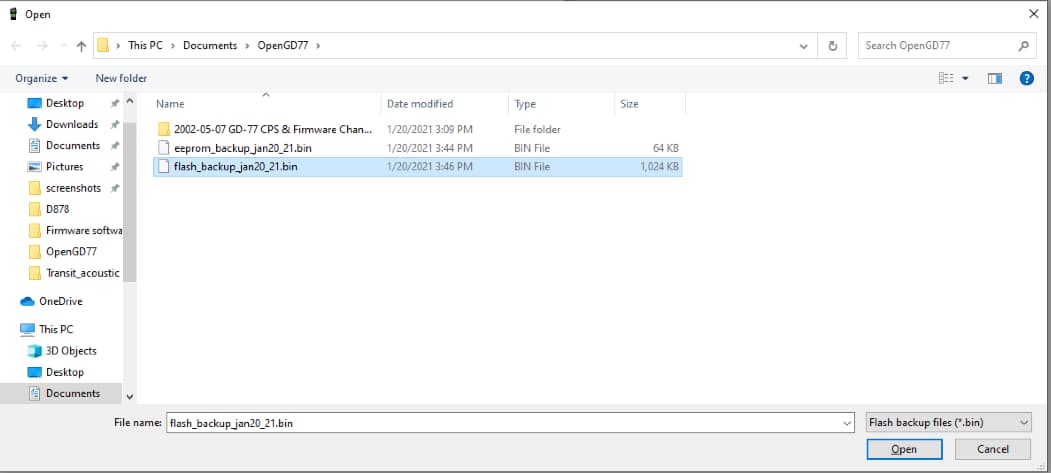
Going Back To The Original Firmware
If you e’er find yourself wanting to go back to the original firmware the procedure is relatively easy assuming you backed upward the EEPROM and Flash before y’all programmed the radio.
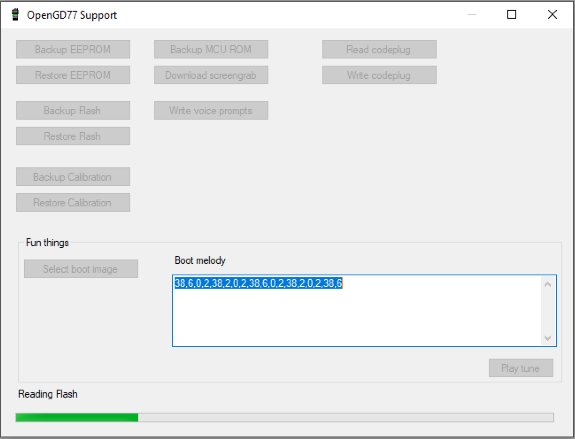
Like before plug in your radio, plow it on and alter to a channel that isn’t in utilize. Open up the OpenGD77 CPS and navigate to Extras -> OpenGD77 Support. It should expect something similar this.

However instead of Backup EEPROM/Wink nosotros’re choosing Restore EEPROM/Flash. Start with EEPROM and navigate to where you restored the file and choose Open. Make sure y’all’re selecting the EEPROM file and not the Wink file as they’re both .bin files.
Repeat the process with the Flash file. This process will have slightly longer than the EEPROM restore.
Your radio should now be dorsum to the state it was in earlier yous loaded whatever Codeplugs onto it. Yous can now install the original firmware onto the radio following the steps from
Updating Official Firmware
to a higher place.
If you have any questions shoot me an email (kc1oip AT arrl DOT net) or notice me on the NEDECN DMR network with callsign KC1OIP.
