

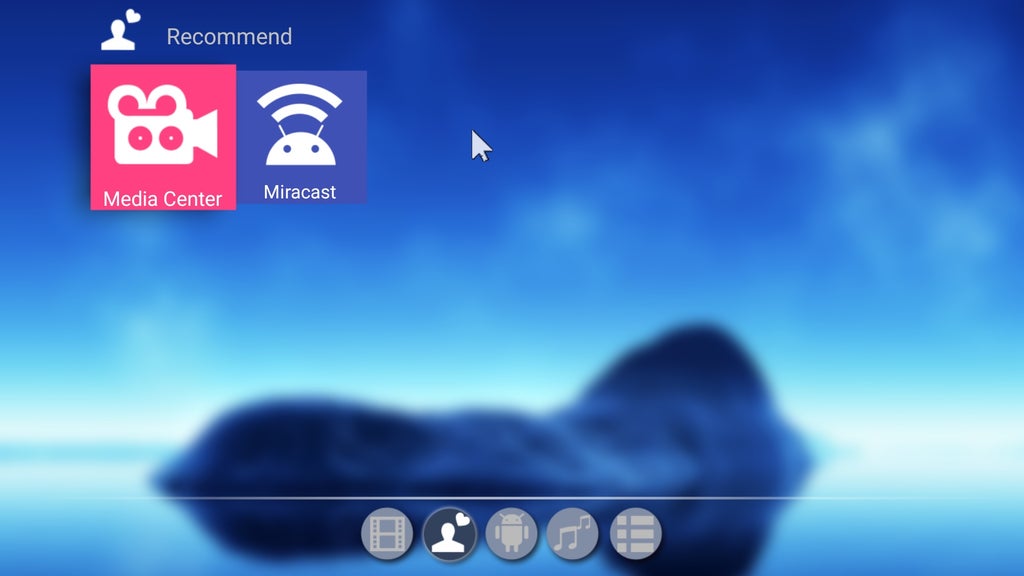
Csa96 Android Tv Box Nougat Firmware Upgrade
Introduction: X96 (S905x) Android TV Box – Updating the Firmware and Costom Roms
Having bought ane of these X96 boxes final year I ever wondered if or when there will exist an update available.
With the affair running on Android 6.0.1 already I was non expecting monthly updates though.
Sadly the box e’er gives an fault in regards to stack not being able to admission the net.
Turned out, at least for my box there is no real link information technology tries to access for the update, and so it volition always neglect.
It too seems I am one of the lucky guy who already had a quite recent firmware installed – from July 2016.
Considering their release strategy and time stamping process the firmware was created sometime Feb- March 2016.
Everything worked fine except that some programs I installed caused crashes at times with no reason I could notice.
Plus Kodi would often take forever and a bit more to go through the menus and get-go things.
The near annyoing part howver was that the remote did not provide the end function.
All player buttons olny pause the video or skip it by 15seconds.
I decided it is time to search for some updates somewhere…..
Step 1: Why Update the Firmware?
If all works fine you should not!
It is e’er better to exit a well running system lone.
Sometimes Android like to bloat upward from all the things we installed.
Every bit with Windows everything leaves stuff behind even if uninstalled correctly.
Over time things can become slow or later on some “tuning” certain parts not longer respond as the should.
With virtually of these boxes already rooted and open to all sorts of attack people even ruin their Android system past the use of tuning tools designed for smartphones….
And there are claims the some people got their box shipped with totally outdated firmware and no online update working.
For all this a backup of what yous need and a fresh firmware install can solve a lot of bug and give you some speed back likewise.
Best reason is if you desire to sell your box after extensive utilize and including quite a few personal things on it.
Nothing animate being a fresh firmware when information technology comes to removing ALL your user data.
You tin can besides try a wipe and factory reset from the recovery console if y’all don’t desire to wink a firmware.
Footstep 2: Finding Firmware….
With the S905 and S906 chipsets the good thing is that basically every box with the same corporeality of memory and same WiFi chip will be uniform for a firmware donation.
Big downside of this manner is that you get a box branded for some other manufacturer and that the remote might non work at all.
No large deal if you lot adopt a WiFi mouse/keyboard kombo anyway.
And of course non every firmware comes in a format the X96 tin can use right away.
At that place are UBS called-for tools to get these firmwares onto a box if you really need to though…
However, I wanted to get the original back in the hope to get a working remote or to find a way to turn the box on and off through the airmouse.
After some digging on the web I found the guys behind the X96 are actually prissy enough to provide more or less regular updates for their boxes, even for the new model with dual WiFi and Bluetooth 4.0.
Only trouble with these updates is that they come without any instructions and are located on a chinese file hosting and website service – pan.baidu.com.
I used the Google translator for several hours without finding any manner to register an account at Baidu without the need for a china based landline or mobile number to actuate it.
There is none, which means every bit a normal guy you can just download files of upward to about 200mb, everything bigger gives you an error message telling you to employ their downloader tool – which needs a registered login as well.
Just at least the firmware was found 🙂
The actual download trouble was solved with some script and browser plugin in conjunction with a download manager.
If you need the details on the how to so please cheque my
Ible
nigh this task.
All original firmware versions for the X96 boxes can be found on this
Baidu account
for download.
Constitute an easier and faster way to get
firmwares for all sorts of S905 boxes.
Footstep 3: Identifying the Correct Firmware for Your X96
I assume you installed a download manager of your choosing and the browser extension and script.
In the Baidu account you see a normal folder structure as you would with whatever filemanager.
It is all a bit messy with folders, files and Rar archives wildly mixed here.
If you click on the chinese symbols in a higher place the listed dates you tin sort it all by date, which makes finding the latest version soooo much easier.
Yous volition now find the folder names.
X96 is pretty obvious, aforementioned for the added (ii+16) or (1+eight) in the name – indicating the firmware for 2GB/16GB and 1GB/8GB boxes.
The latest dates is always the latest firmware.
The one with 6330 in the name is for the new model that has dual WiFi and BT4.0, available for the normal and 2G versions.
As I only accept the standard ii/16 box I will focus only on that model but the procedure is the same for the others.
A double click on the folder symbol next to the name will open the files contained within.
Ordinarily 3 or 4.
You need to download all of them! Don’t just download the prototype for the firmware lone as it won’t work.
Step 4: Installing the New Firmware
If you accept not washed then then now is the best time to consider a backup!!!!
For Kodi you tin use backup tools provided past the customs, just make sure to save or copy it on a SD/USB stick.
For the programs, games and other things you might have installed on your box the best option is one of the backup solutions from the playstore or to install them all fresh if you have your progress and details saved in the deject anyway.
Lamentable for the bad image quality bad my cam struggled to get whatever focus on the screen 🙁
Become a SD menu that is formatted in FAT32 – no ETFS no NTFS please!
Copy all firmware files into the root of your SD carte.
Place the SD card into the slot of your box – without the power cord in it please.
Plough the TV on and get a toothpick 😉
Inside the AV port is a tiny push button – you need to press information technology with the toothpick, hold it and plug the power in.
Later 2-5 seconds you lot will see a X96 logo on the screen – now release the button and remove the toothpick.
The box is at present in the correct mode to install the firmware without request from the SD.
Yous will see a little Android on the screen and a progess bar showing you how long information technology might have.
Whatever you practice – practice not turn the power off at this stage or will have a useless brick!
In my instance it was most 10 minutes to complete.
The box will reboot and as it struggles to deal with the SD and dongle for the airmouse it might hang on the X96 logo.
Wait a infinitesimal or 2 and if all the same stuck power off and remove both the SD and the dongle or whatsoever else you lot might accept in the USB port.
Now the box volition showtime as normal and become dorsum to naked Android, significant you have to setup your Wifi and accounts.
After that Kodi will work equally before and needs to update some addons and besides conciliate some that no longer piece of work – damn bloatware…
Y’all are ready to enjoy a new box now.
The firmware currently bachelor is dated August 2016 simply was only uploaded recently.
Step five: Troubleshooting With the New Firmware
The commencement thing I noticed that sometimes the remote is already activate and sometimes it is not.
Very annyoing if you don’t take a keyboard/mouse at manus to modify the settings.
Simply as before the remote still fails to give me a stop push button that does what information technology is supposed to.
I will endeavor to play around with the config file for the remote to see if I can get that fixed somehow but if all works fine on your remote I might just have a dodgy one.
In some cases I noticed that the Google Play services crash right after the start.
If it happens once and afterwards that every kick upwards is fine all is good.
In example it ever crashes and the Playstore or your games fail to work install the firmware again.
I approximate the installation does non fully delete the partitions before getting the new firmware on information technology.
The Kodi version is now slightly different and allows for easier downloads of the stuff y’all watch, simply I won’t get into details of this.
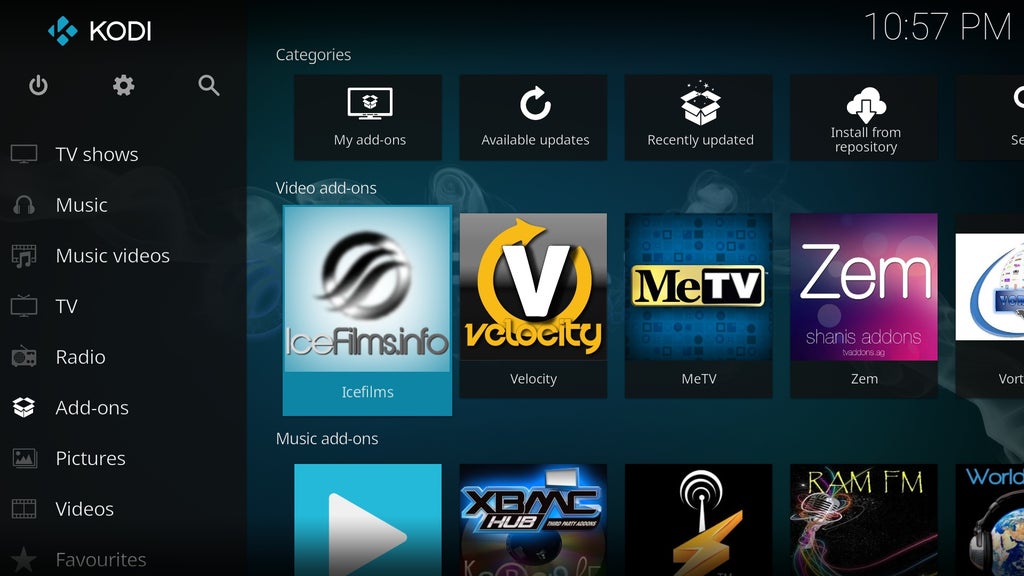
The usual addons are all there, same for the wallpaper and bill of fare structure you are used to.
I strongly recommend to give Kodi plenty fourth dimension at the first commencement to update and discard all addons!
Declining to do so will cause issues later on, and then don’t say I did not warn y’all.
Some addons also mess upward certain things in Kodi, and so exist carefull what you install on your ain when it comes to wizards.
If in doubt and Kodi ends upwards badly you can always wink the firmwar again and beginning over 🙂
Footstep six: Things Still to Practice….
Firstly I want to get the remote working with all buttons as they should simply as said mine might exist dodgy so delight study back if you accept the same trouble with the stop button.
Secondly I would like to homebrew the firmware to include a basic Bluetooth stack that would let the employ of a dongle.
Terminal but non to the lowest degree I would like a bloat costless Kodi version included.
Don’t become me wrong, information technology is quite nice to accept a lot bachelor but not and then nice if 80% is of no interest at all or not even working in my region.
For this I am not sure if information technology is easier to do on a firmware level or past calculation it thorugh the recover in the grade of an additional firmware part to be installed.
The outset with the remote seems to be doable one way or some other for the rest I volition demand time, mostly for reading up on how to make your own firmware.
Step 7: Tin can I Use the X96 Firmware on My M8, A96 or Unbranded Box?
Aye and no.
No considering I really don’t have a inkling about the actual hardware of your box.
Yeah because all boxes with identical hardware and using the same update procedure should be uniform.
For you information technology ways using a hardware info program from the playstore to check if retention, CPU, GPU and other hardware are the same as for the X96 firmware in question.
As most modded or geniune firmwares for these S905 boxes work fine on the X96 I don’t see why information technology would be any dissimilar the other manner around.
But as with the X96 you might take problems getting all functions of the remote working.
Mostly the power push button is afflicted being lost or relocated to the 2 key on the remote.
If in doubtfulness always keep a re-create of your remote config file.
It is possible that some boxes ignore the files on the SD as they look dissimilar filenames.
Here I can’t assistance unless you lot observe the correct filenames yourself.
Same story if the box merely expects a Cypher file on the SD for the update.
The only sure way to overcome these bug is to employ a USB flasher program and to convert the firmware files into a format the plan can handle.
Like this yous can literally install whatever you feel like but besides risk ending upwards with a brick if the firmware is really incompatible.
Worst here would exist to employ a version that is only supposed to work with a unlike amount of RAM – similar installing a two/16GB version on a 1/8GB box…
If you do it and then you practise it at your own risk!
Don’t come up dorsum to blame me if a firmware not designed for your box won’t work!
Footstep viii: Are In that location Alternatives to What Is Available?
Certain, as with smartphones the modding customs is quite agile.
If your box has a common chipset and graphics carte then chances are good someone cooked a firmware together already.
A practiced place to start is over at the XDADevelopers forum.
Then at that place are diverse forums defended to certain models out there.
If you type your chipset, eastward.g. S905 and some meaningful other words into a Google search yous go something like
this.
Right at the top some forum links and further down firmwares for various models out at that place.
Exercise some reading, get some ideas and the right programs in instance yous need to flash over USB instead of letting the box do the affair from the SD card.
Are those alternatives or even a firmware for a different box amend than what you already have?
No inkling, all depends on how all is working, especially those with 4K TV sets and Dolby systems connected often suffer from all sorts of problems in terms of perfect image and sound quality.
If your box is quite quondam in terms of firmware, let’s say from 2015 then it does brand sense to want try something new.
Same if certain things just never actually piece of work, noone wants to have the box close downwardly when the movie is just getting interesting LOL
Installing a custom firmware is risky, especially if your hardware is specifically listed to exist uniform – often in a thread users test the firmware on their devices, so bank check there as well 😉
If things go bad it ordinarily means the box is unresponsive and installing the original or an otherwise working firmware volition prepare information technology.
But if you lot install something that simply tin can’t work on your hardware yous might end with a brick.
For a lot of boxes you tin get custom recoveries – if y’all want to play with firmwares so delight consider a custom recovery commencement!
The stock recovery is often limited and only allows for a factory reset or the installation of a firmware.
A proper wipe and clean or even fixing bootloader problems is only possible through a custom recovery, a flasher program or ADB, the last only helps if you really know what y’all are doing.
A question I was asked quite often is how to backup everything before installing a new firmware.
For Kodi you become addons to do just that, even into your cloud account.
For the rest all I can say is that it runs on Android and that the playstore offers enough backup solutions for all budgets.
If you lot need your progress for installed games, business relationship settings or y’all special network and proxy configuration than please practise use backups 😉
Step 9: Installing a Custom Firmware
I was able to find some useful tools that should allow easy backups and the installation of other firmwares.
Will do some tests over the side by side few days and share what hither what I institute out.
If any of it turns out positive I volition share the files and links and then everyone can benefit from it.
So far I was able to download a nice collection of tools.
I paid attention to make certain they tin all work in Windows, and so no cryptic Linux stuff involved 🙂
Of course some nuts are nonetheless required like a working Java enviroment, Cygwin, DOS basic and so on.
Simply then far I have:
Working TWRP recovery
Working custom ROM
Working tool enviroment
Main trouble is now to make a stable firmware from the last original without the bloat and instead some essential programs, plus the Kodi Krypton release every bit an culling to the Jarvis version – but will have to do some more testing and find the right beta for this.
So there is the little problem of putting all this into some readable form so other people can change their X96 or other S905X based firmware the same way….
Then let me know if you would merely adopt a firmware to download and install or if y’all want to know all the essentials of making ane – please use the comments instead of a PM.
Step 10: My X96 Firmware Mods….
Later some time reading and digging through the WWW I found all the tools and info I needed to give ROM Cooking a endeavor 🙂
Hither is what came out of my kitchen so far:
(Please allow some time for the links to appear here as I still accept to create suitable update packages and upload the files! And I am still writing on this, in case it appears incomplete 😉 )
Of import!
Although I tested everything on my box and but upload what really works, I can not know if your box is actually a X96 2GB/16GB Wifi only – or some clone.
That means the first thing you take to do if the Recovery boots on your box is to make a backup!!
Disclaimer
I am non responsible if y’all feel the demand to try my firmwares and your box is bricked when washed.
Everything y’all is at your ain risk and by downloading the files you agree to accept this!
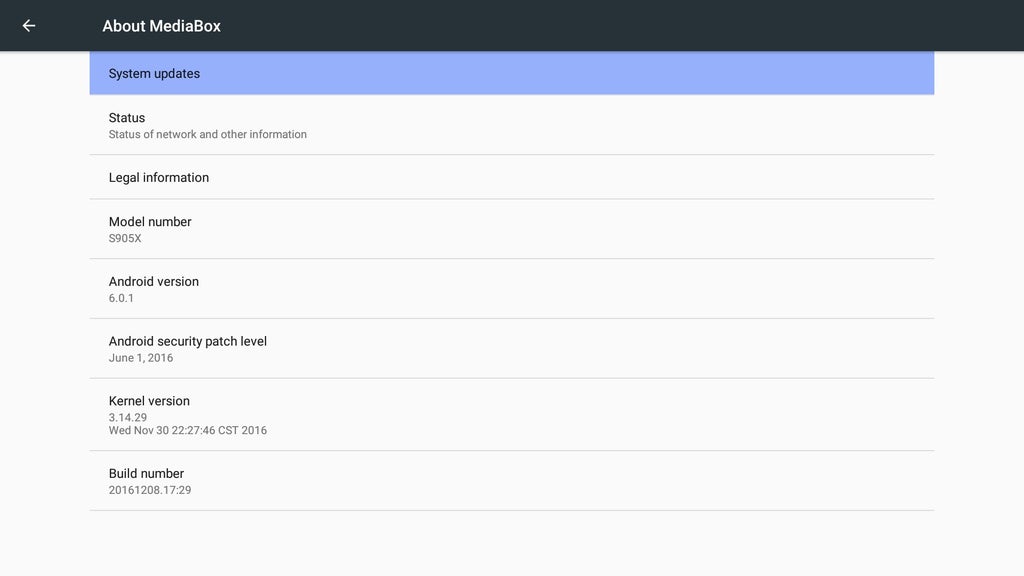
I only say it works on my X96 box with P212 firmware.
General how to:
If you do take a lot of Kodi stuff added or personalised I advise to use the Kodi backup functions, bachelor equally an addon.
For additionally installed programs, account settings and so on please use the backup solotion of your choice.
All files are uploaded as a Rar archive.
Within the Rar archive yous volition find what needs to be extracted to an empty SD carte.
I suggest to use a fast one with at least 8GB so you lot have enough room for a few backups.
In one case the SD card is ready and inside your box (powered off) you stick a toothpick into the AV port and printing the little push inside, plug the power in and when you come across the X96 Logo on the screen accept the toothpick out.
Shortly afterwards you see the TWRP Recovery screen and need to swipe to confirm you actually desire to write onto your system.
This is why we need the keyboard/mouse combo – no TWRP possible but with the IR remote!
Again, the first affair you want to do now is to make a full backup of your box!
Select everything only Cache and let TWRP save your backup on the SD card y’all use for the installation.
At present become dorsum to the master screen (the little button for back in the “condition bar at the bottom”).
Wipe all but the external SD card and USB through the Advanced Wipe office.
If y’all want to attempt to go on installed programs then come across if it works past non wiping the data function, although I do non recommend it.
Time to install the Zilch file of your selection to install the new firmware.
Be patient!!!
The first boot of the new firmware will accept quite some time.
The X96 logo will be on the screen and it seems that nothing happens and the box is bricked.
Don’t fall for this as I did so in my commencement firmware attempts.
As all is deodexed and prepared for a quick transfer to the box the bodily setup of everything happens during the beginning boot in the groundwork.
In some cases the progress bar in TWRP stops to breathing right afterwards the firmware starts installing, if that happens for more than a few seconds shut down and reboot into recovery.
Without another wipe but install the Naught of pick again and information technology should keep fine.
I have not figured out what this causes, same for the touchpad sometimes simply working if the USB dongle is replugged.
Happens for near 1 in 15 installations, and then you might never feel it anyhow 😉
– download the recovery itself if you just demand a backup or for the X96 Naked.cypher to flash it.
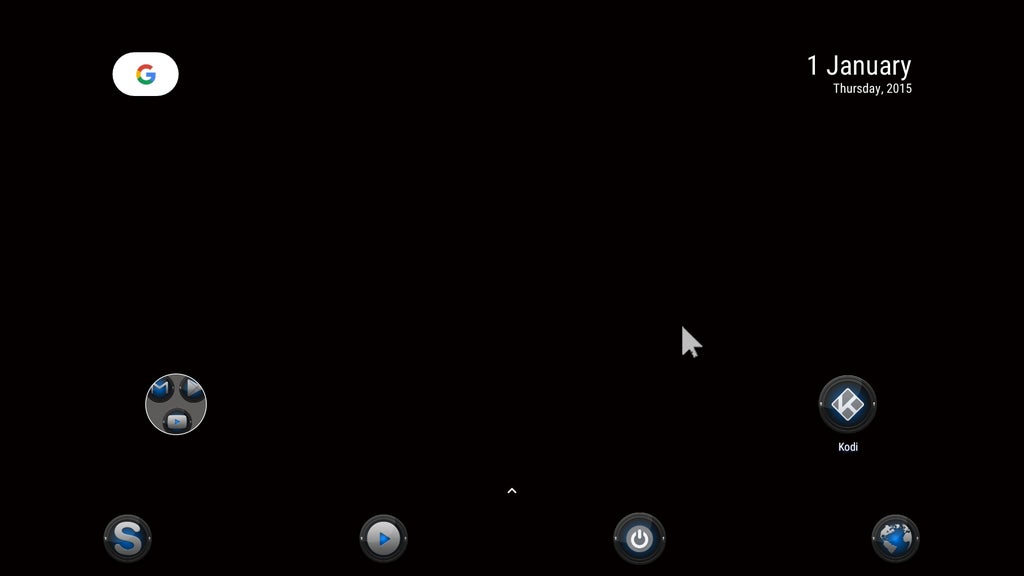
1. X96 with slimmed downwards Kodi addons and keyboard fix.
If yous have these standard WiFi keyboard/touch mouse combos than the trouble with the Enter key should be gone for skillful.
I included a fixed keyboard layout for the keyboards with the hardware ID 0e8f:2519.
There might be other ID’s for example if you use an air mouse with keyboard.
If yours still won’t work with this fix so please post your HID in the comments and I might include it with the next round of uploads.
In case it does work:
The ALTGR fundamental volition toggle the screen keyboard and go far go abroad too.
OK and ENTER will now do what they should without producing unwanted characters or the need to use the pad to click on the onscreen enter button.
Klick on this to download from Filefactory
2. X96 full Kodi and keyboard ready.
This is essentially what you lot get from your normal mill update only with the fixed keyboard.
Klick on this to download from filefactory
3. X96 naked – this will be the base firmware y’all should employ for every addition that comes below.
Here nosotros accept the OTA update stripped from all apps that would be otherwise included except the pure Android stuff like Playstore and Gallery.
For all additions and mods this is the base firmware used.
I decided on going this route instead of making all mods within the firmware to avoid complications and give the user more liberty of selection.
Since nosotros need all folder structures created you lot have to kicking and do the usual Android and Google account setup.
Practise not endeavor to outset Kodi as this won’t work and we don’t want to cause trouble trying to starting time something that is not at that place!
Klick on this to download from Filefactory
1. X96 Naked Kodi Box
This Rom is for anybody who wants the box merely to exist used with Kodi anyhow.
Then after the initial setup you can boot directly into Kodi without any launcher or things like that.
For this Rom I removed all the bloatware and only left the system apps, so no Skype, Facebook, Youtube, Twitter and then on, nothing but Kodi.
The box will commencement and present you lot with a selection for the launcher.
XMBC is for Kodi
MBox is the standard launcher equally you lot know it
I left the standard launcher so you can cheque and conform all your personal settings and see what is left in terms of programs without getting too dislocated by the new interface.
One time you lot are done simply printing the HOME button on the keyboar/remote to select Kodi as the default launcher.
You can either brand it permanent or set it for once and be asked again at the next boot.
Kodi and the firmware is based on the concluding OTA update.
If you need whatever other addons please ask Google on where to find them.
How to:
Install X96 naked and prepare if not done already.
Copy the addon ZIP file to the SD you used for the previous installation.
Kick into recovery and select the respective addon ZIP file for installation.
You lot can choose betwixt Kodi 16 Jarvis and Kodi 17 Krypton.
In one case the box rebooted y’all can select if you want to apply the MBox Launcher or the XMBC Launcher for Kodi.
The selection can be for once or permanent, you lot cull.
Klick on this for Kodi 16 Jarvis
Klick on this for Kodi 17 Krypton
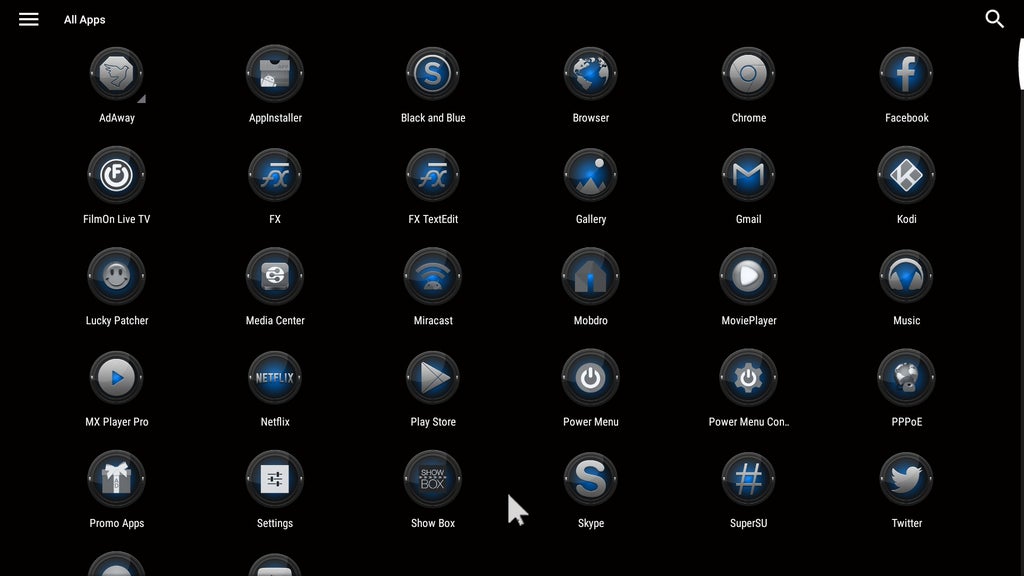
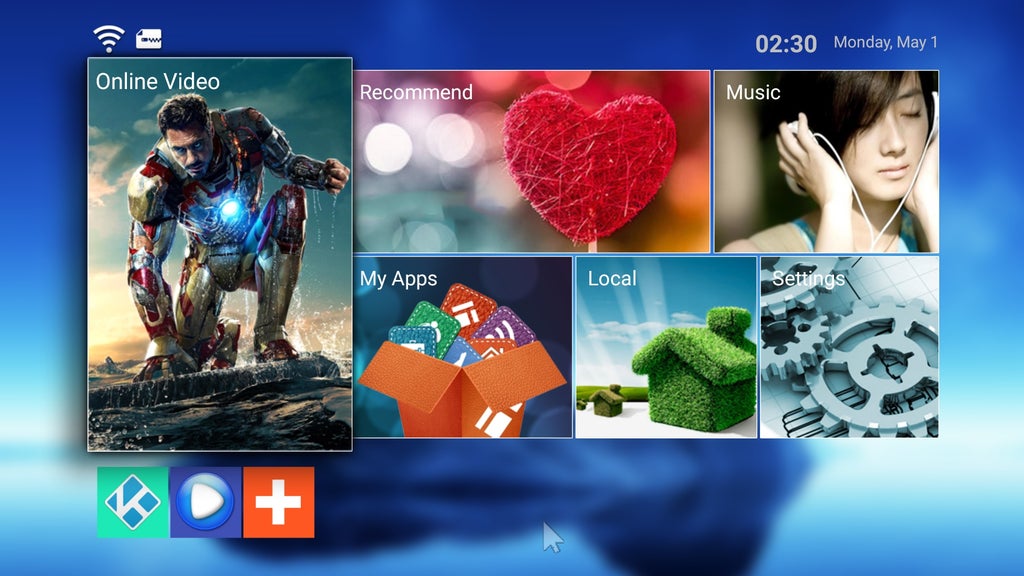
two. X96 All in
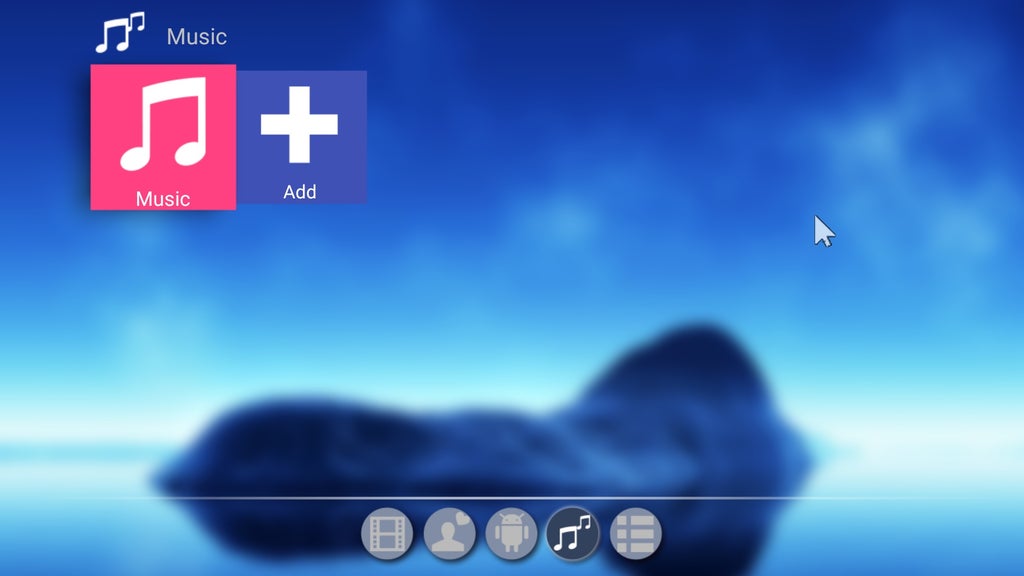
Here we take the selection of Mbox, Kodi (XMBC) or ADW as the launcher.
I highly recommend to endeavor ADW 😉
On acme of that at that place is too a dark theme for the ADW launcher and corresponding nighttime buttons for everything.
Additionally I added some programs that I apply quite ofttimes and that you lot might notice useful too.
For Kodi I added the full addon pack with all addons updated and nonfunctional ones removed.
If you want it simply as a Boob tube box you tin ready XMBC as the default launcher.
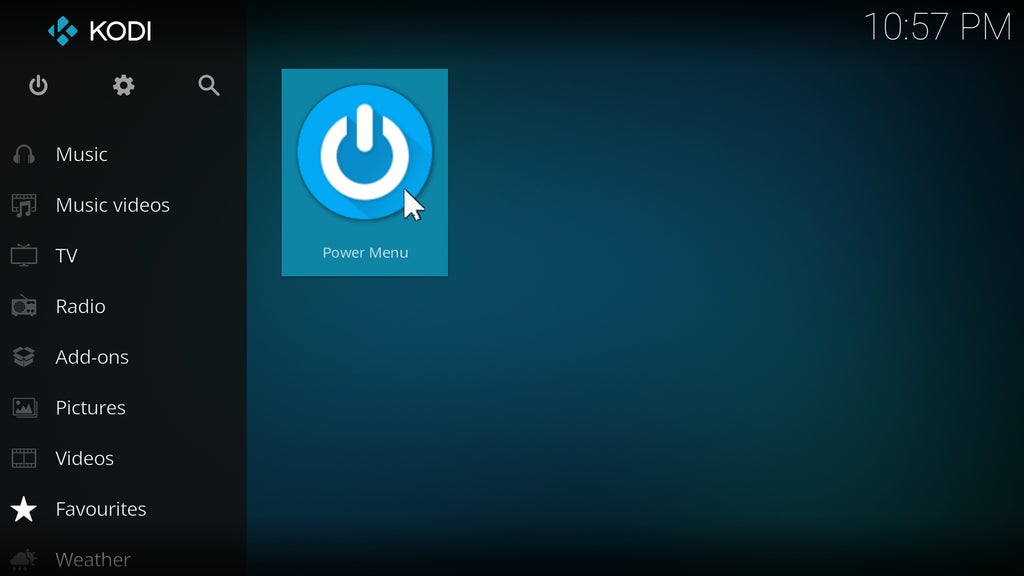
Android apps can be added to the favourites same manner every bit the power menu, then add what you similar 😉
The firmware flashing takes nearly 5 minutes afterward the MD5 check is over.
The showtime boot to the standard Mbox launcher takes about 3 minutes but from in that location you need to be patient while all the programs are installed.
All upward wait to wait at least 25 minutes to be on the condom side here.
Y’all volition run across how the shortcuts continue adding to the launcher screen….
Once the process is complete you will run into the retention usage level out and stay steady around 25.four-25.85%.
If in incertitude only take some dinner while the box is doing it’southward thing 😉
As so far I am unable to include all programme and launcher settings you will have to do some manual labour which I will explicate now:
To clean everything upwardly memory wise I strongly propose to reboot through the IR remote in one case the box is really done installing all programs.
This next boot will requite you a option for your launcher – click on the Media Box Launcher for 1 fourth dimension use so you tin notice your fashion through with a launcher you are familiar with.
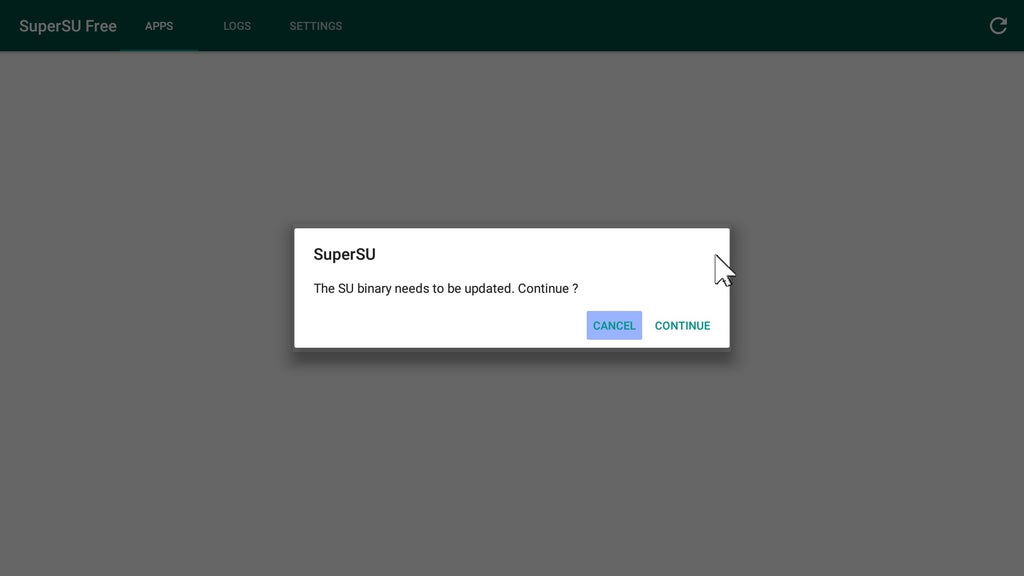
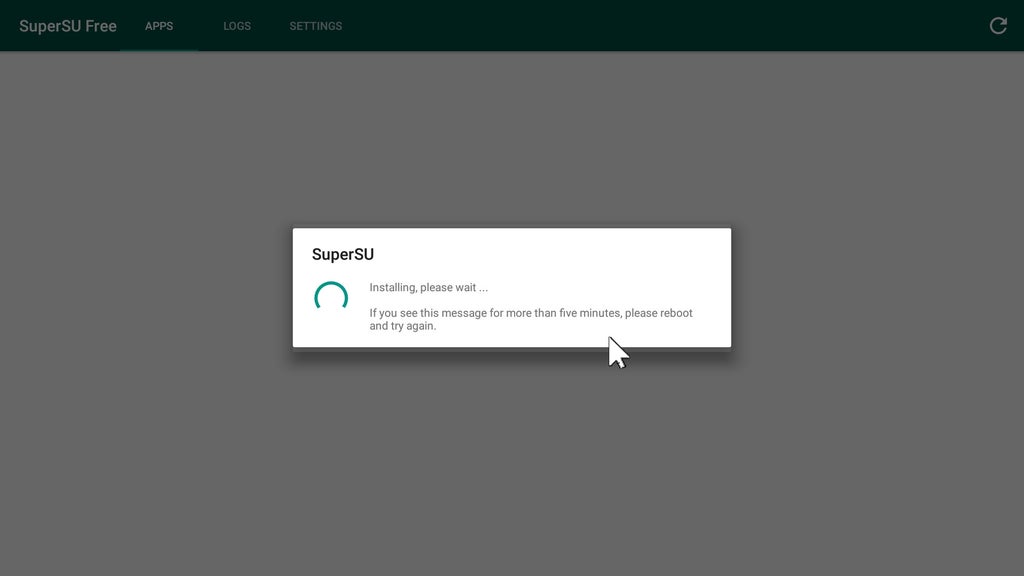
Practise the network and account setup, change your screen zoom if required and and so showtime SuperSU so it can update the binarier (required footstep).
The normal way works fine, if not the first time wait a minute or two and try again, SuperSU needs all groundwork activities to exist dormant then sometimes you lot just demand to endeavour until it works.
For me I never needed more than 3 attempts if the first failed.
Reboot now as indicated by SuperSU.
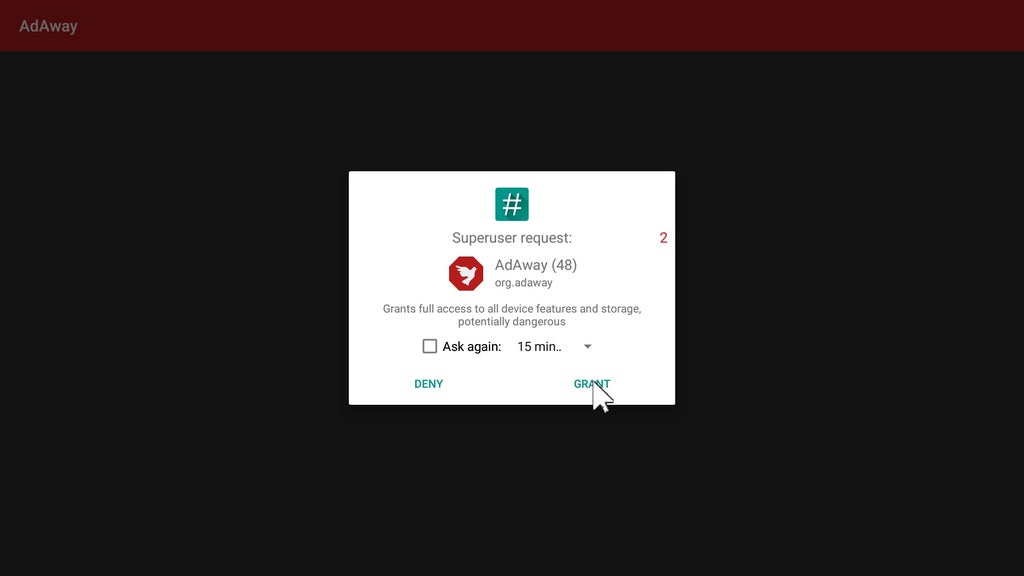
Of course several apps volition need root admission through SuperSU, so delight grant them this forever to brand it ork properly.
Side by side step is to activate the AD blocking by starting AdBlock and downloading the lists.
If you don’t like reboots then tick the box for never and say no to reboots.
Only means the new lists volition be agile afterwards the next boot of the box.
If you lot have utilize for Lucky Patcher I suggest to kickoff it now and download the custom patches and usual lists, otherwise just leave this program lonely 😉
Time to add together some fun 🙂
Start ADW Launcher and select the basic theme you like, I used the first on the left.
I do a long mouse printing on the Promo icon in the lower right to remove information technology from the screen and identify the shortcut for Kodi here.
To get Kodi on the master screen:
Click the little arrow in the lower center of the screen to bring the apps menu upwardly.
Hold the mouse push button while dragging the icon to where you want information technology on the main screen – easy 🙂
Same story for the Power Menu – I identify it between the player and browser button on the lower icon bar.
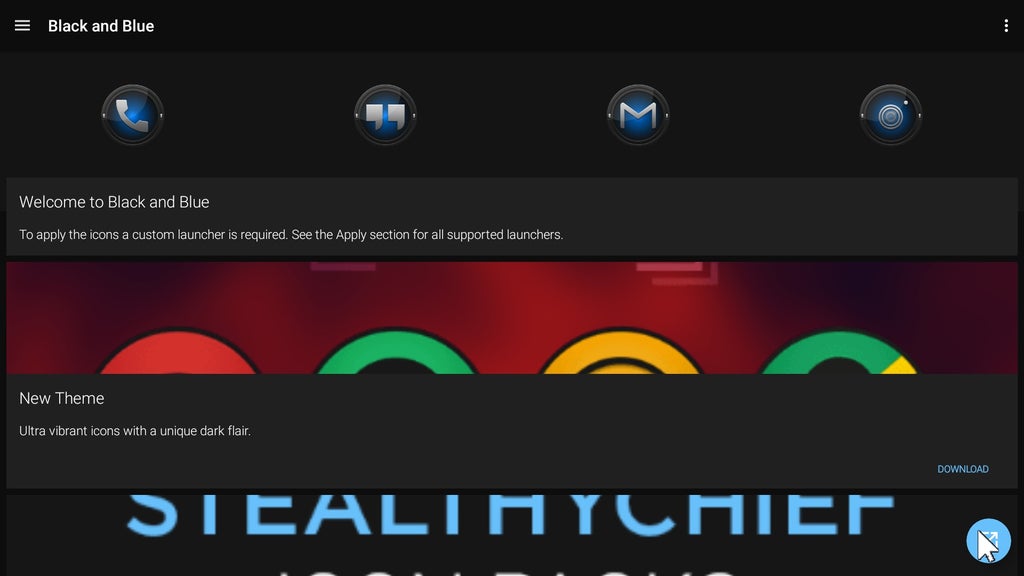
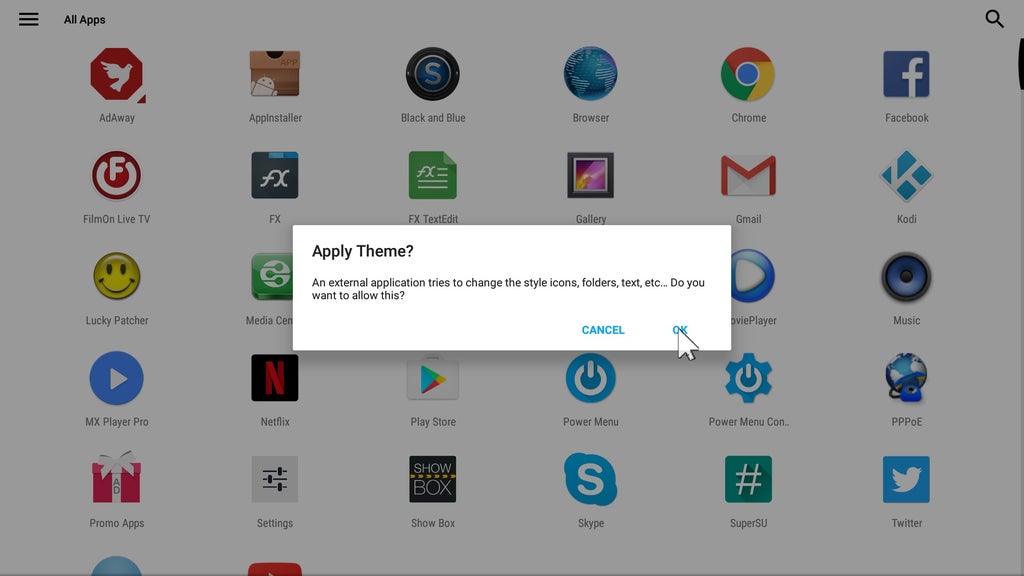
To become information technology really prissy commencement the Blackness and Blue Icon pack and select ADW.
Confirm that you want to use these icons and savor a nice dark look for your launcher.
Feel free to customize to your liking at a afterwards stage.
Press the Home push on the remote or keyboard to bring upwardly the launcher selection.
Fourth dimension for XMC Launcher to start Kodi.
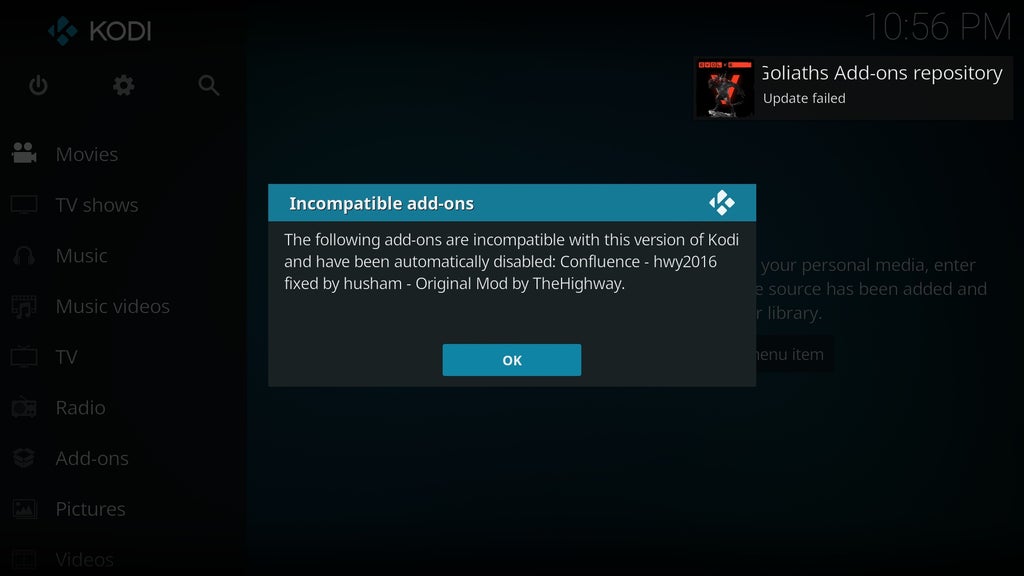
Kodi should non demand to update endless addons, todays test showed but a few had updates available and two had been discontiued to work, the rest is upward to date.
Once all is updated and you made the personal changes in Kodi you similar (including testing a stream or two) you tin endeavor the favourites menu to restart the box through the ability bill of fare.
At present you lot are set to go and savor the new wait and feel of your Television box 🙂
Of course I now have to strongly communication that you finnish whatever yous want to add or alter to your box and practise a proper backup with TWRP onto the external SD 😉
Proceed in mind all bloat required for the initial installation is gone one time the Kodi setup is complete to increase system space.
This means a factory reset will give y’all a naked box without filebrowser or annihilation of utilize and you need to install manually later visiting the playstore – a backup actually does wonders here…
Check the screenshots below (click on image for full size view):


For Kodi 17 the pics are the same as I now included the Confluence skin.
To get the former Kodi look with Confluence:
Go into settings, skin and select Confluence 😉
Click this to download part 1 of the Kodi xvi version from Filefactory.
Click this to download role two of the Kodi sixteen version from Filefactory.
Click this to download part three of the Kodi 16 version from Filefactory.
Click this to download office one of the FULLY UNBRANDED Kodi 17 version from Filefactory.
Click this to download part ii of the FULLY UNBRANDED Kodi 17 version from Filefactory.
4. Fully unbranded!
Later on a lot of swearing, flashing, more than swearing and flashing I finally managed to create a fully unbranded system that tin be installed through TWRP.
If you lot still know how the original X96 looks with the original firmware you will exist surprised
What has changed from the branded firmware:
Bootlogo original S905X.
Google bootanimation – that was the hardest part, assuasive for a custom animation…
Media Box Launcher unbranded and with unbranded theme.
Unbranded Kodi completely removed so the rom will comply with all piracy laws and restrictions – more in the added apps section.
OTA updater removed.
All programs from the branded version removed, so no social media, Chrome, Netflix and and so on.
Apart from the naked system with Google apps I included:
AdAwayADW Launcher
XMBC Laucher for Kodi
File browser replaced by FX filemanager
Power Card added – still requires to root the box! More than under added apps.
Added apps and modifications:
Kodi was removed, simply the install script for the addon packs is nevertheless valid.
The script no longer refers to the organization binder but to /sdcard/apps
This means if you decide to install Kodi you can place the tar.gz archive for the addons in the apps folder of the internal SD. Kodi itself is non included.
The additional apps I thought to be of utilize volition exist in the apps folder of the internal SD.
In FX file explorer it is called “Main Storage”.
Here yous volition find:
Chrome
Facebook
Film On (from the branded firmware)
Lucky Patcher
Mobdro (from the branded firmware)
Netflix (from the branded firmware)
Showbox (from the branded firmware)
Skype
SuperSU by Chainfire
Twitter
VLC for Android
Iii unlike Youtube apps to cull from, including a TV version.
How to install SuperSU:
All modifications to the kick image, scripts, libraries and and so on are done and included.
This means the system is rooted except for the actual Superuser app.
Install from the apps folder and let the binary update, one time washed reboot and enjoy.
Ads…
Not all ads in programs or while surfing can be disabled by AdBlock.
For example everything coming from “trusted sources” like Google will even so be allowed.
This is the but reason I included Lucky Patcher every bit it tin exist of apply for some apps to enjoy without ads.
Install and use at your own risk!
Installation of the ROM:
As before wipe all through TWRP then install the Nothing file from extracted RAR archive – so unpack the RAR first to your SD card.
Installation through TWRP does accept a few minutes due to the hash verification.
Since all included apps are integrated into the system the first boot is a bit faster compared to the above ROM.
And the additional apps land on the internal SD for everyone to choose or delete if not wanted.
Delight let about v minutes after after the launcher selection appeared before you lot actually start using the apps – some things are still installing in the background!
Once you finnished the network and personal setup of accounts and such boot into TWRP and make a full fill-in in example you need information technology.
A manufactory reset will fix you back to the point of the installation of the rom – so no SuperSU and the added apps folder might be gone too.
Known bugs:Just noticed the WiFi is not always available at offset activation.
As the chipset is identified during activation you might have to select the network twice until you run across WiFi bachelor.
Screenshots and sneak peak video:
Pace xi: Brand New Firmware From April This Twelvemonth – Navbar and Notification Shade!
Here nosotros take a new firmware fresh from People’s republic of china.
They listened and gave the states navigation bar and notification shade.
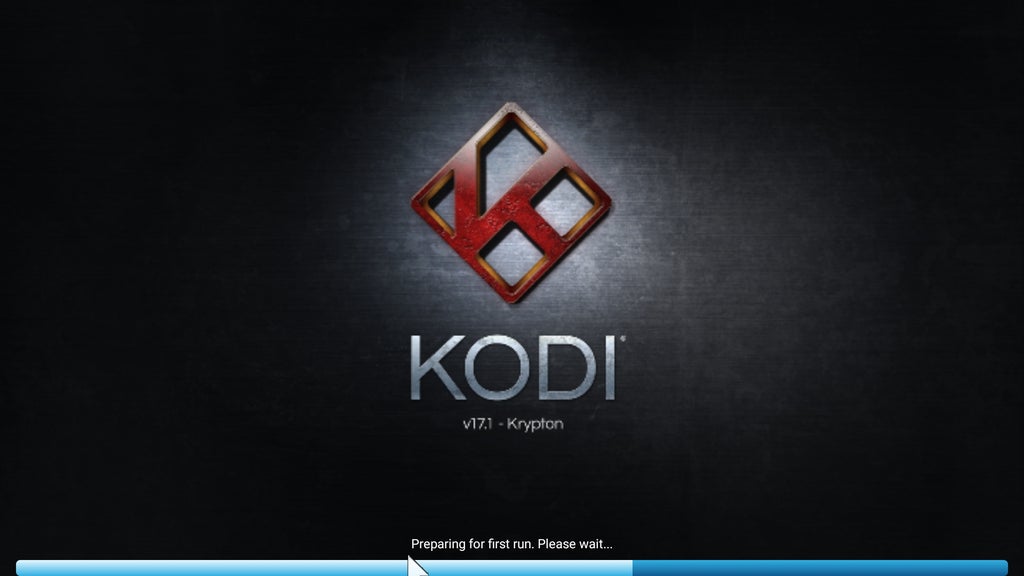
Kodi was replaced by an updated Krypton version named KD Player.
You can download the original OTA update
hither.
Unpack the RAR archive to your SD card and boot into the original recovery using your favourite toothpick within the AV port.
Sadly the bootanimation is again fixed to the default somehow and I have no clue how to ready this.
Organization runs very smooth and stable.
Tin’t do any 4K or special HDMI tests equally I only have a crappy flatscreen.
based on the higher up OTA.
This is a reduced firmware containing merely the Google apps, FX File Explorer and keyboard fixes.
I did this and then the rom can be installed on 1GB devices besides equally to intendance for all those wanting to decide themself what they install on superlative of Android.
In the annal for the
additional apps
you will find all that was removed from the OTA plus heaps more.
Simply unpack the archive and install the apps you desire.
The Google apps are from the Goggle box GAPPS package, not all might work as I did not fully test them on this rom.
Really desperate tweakers tin can also endeavour the
Xposed framework
for the X96.
Flash the included ZIP and then install the Xposed installer.
To get in all consummate you can utilise this Kodi
Addon pack
.
Utilize FX to unpack the contained TAR archive to /sdcard/Android/data – your internal information folder.
Here we have a version I fabricated with
videoboot
.
You can supersede the one provide with your ain MP4 file.
Location: /system/media/bootvideo.mp4
Step 12: New Firmware Based on the OTA Update From June 2017
I did non meet any existent changes or fifty-fifty improvemnts in the OTA.
The Music player randomly crashed, Kodi installed but refused to piece of work, e’er a blackness screen as before long equally a plugin was selected.
Only real deviation I noticed was an updated setup wizard for Google.
Then I took this firmware equally a playground instead of trying to ready all issues the problems were removed or replaced.
The real benefit of this firmware seems to be a set up for the brightness bug.
Kodi or Youtube now prove vibrant colors with great dissimilarity, black and dark grey are no longer the same 🙂
It likewise seems that Kodi is much more than responsive and takes far less time to discover streaming sources.
Notable things about this firmware:
Fully rooted with SuperSu installed.
FX File Explorer to replace the default.
The usual fixes for keyboard and and then on.
Logo and animation change to the defaults instead of branded ones.
Google keyboard replaced by the much smaller Hacker’s keyboard.
AdAway.
Pulsar to supplant the stock music player.
VLC to replace the stock video actor.
Kodi 17.3
Some other programs I find useful are installed too, some merely fix for you to install from the Apps folder on the internal storage.
Overall running dainty and stable with no problems and then far on my end.
Installation:
Equally usual unpack the RAR archive to your SD card or USB stick.
Kick with a toothpick to get into TWRP recovery.
I recommend a clean install after wiping Cache, Data and internal retentivity.
The first boot takes some time, so exist patient – once the CPU usage levels out you can do your personalisation, network setup, Google business relationship and and then on.
Do’southward and Don’ts:
Every bit said a make clean install is recommended only of course you can effort without wiping if you desire to keep your personal data and program settings.
If TWRP fails with an Error 7 and so simply get back and select the Aught and install once again.
If y’all want to make sure your installation goes equally planned and so please follow this:
Allow boot until the CPU usage levels out.
Starting time SuperSu and update the binary – if this fails it means the kick was not complete yet!
Now reboot the box.
Setup your network, screen zoom, Google account and whatsoever y’all want to prepare.
Cheque the Apps binder on the internal storage in case yous need some more apps like social media stuff…
Kickoff the playstore and check for updates.
Start Kodi and expect and so it can check for updates, commencement your favourite addon and cheque that it works.
Be aware that at the first start Kodi will be a bit wearisome to response and might seem to accept crashed once or twice.
This is due to updates in the background – please wait until Kodi is responsive over again, it tin can take upward to five minutes!
Once Kodi runs smooth the box should be ready to go, so please reboot again just for good measure.
Exercise non endeavour to update Google apps on this release as it will fail due to firmware restrictions.
If you install the Advanced Power Menu from the Apps binder you need to commencement it in one case to give root permissions.
I included it so yous can direct reboot the box instead of merely a power downwards.
Netflix should work fine but equally for Youtube I can not test 4k videos on my crappy TV.
How to make a working backup from your former setup:
TWRP will make a backup of your organization simply won’t include the so called Media department of the data partition.
This mean y’all need to manually create a backup of your internal retentivity.
I susggest to use FX for this and to pack the Android folder, Apps folder and all program folders you find and demand on your internal storage.
If used likewise include the media folders for images, videos and and so on.
To get the backup running once again commencement flash the backup with TWRP so upack your secured backup of the internal storage back onto the box.
For obvious reasons information technology pays off to copy this annal from your internal storage to SD or USB stick 😉
Download the modded June update from Filefactory
.
